
Table of Contents
What is a pattern?
In graphic design and printing, a pattern is defined as the repetition of an object or symbol within a piece of artwork. Using patterns and, therefore, this repetition of graphical elements, helps to make a piece of creative work more visually interesting. What’s more, patterns help to create unity and coherence between the different elements of a brand’s identity.
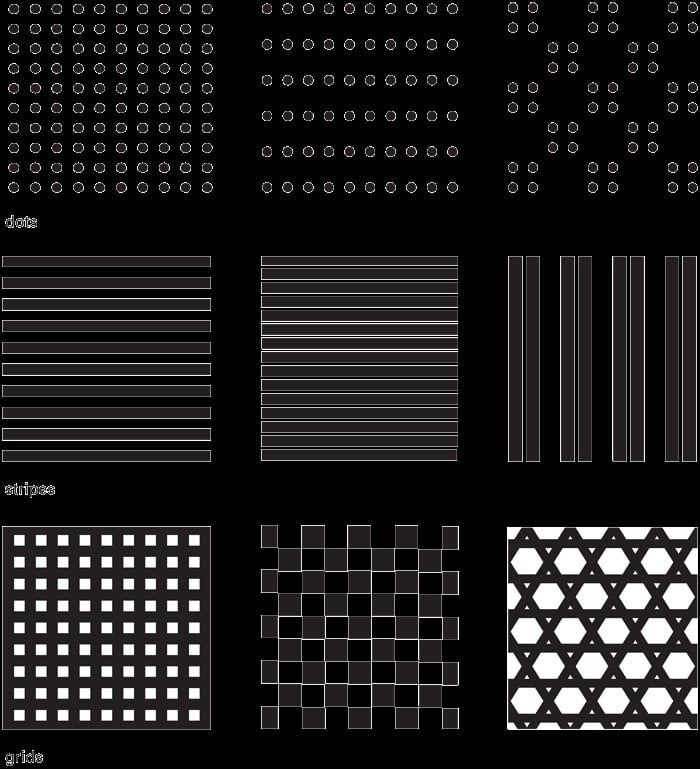
The main technical feature of patterns is that they are uninterrupted. This means that there are no interruptions in any given section, making patterns ideal for applying to surfaces of any size or proportions.
The beauty of these motifs lies in their geometric and symmetrical nature. A pattern creates complexity through the repetition of its elements, which on their own are often simple.
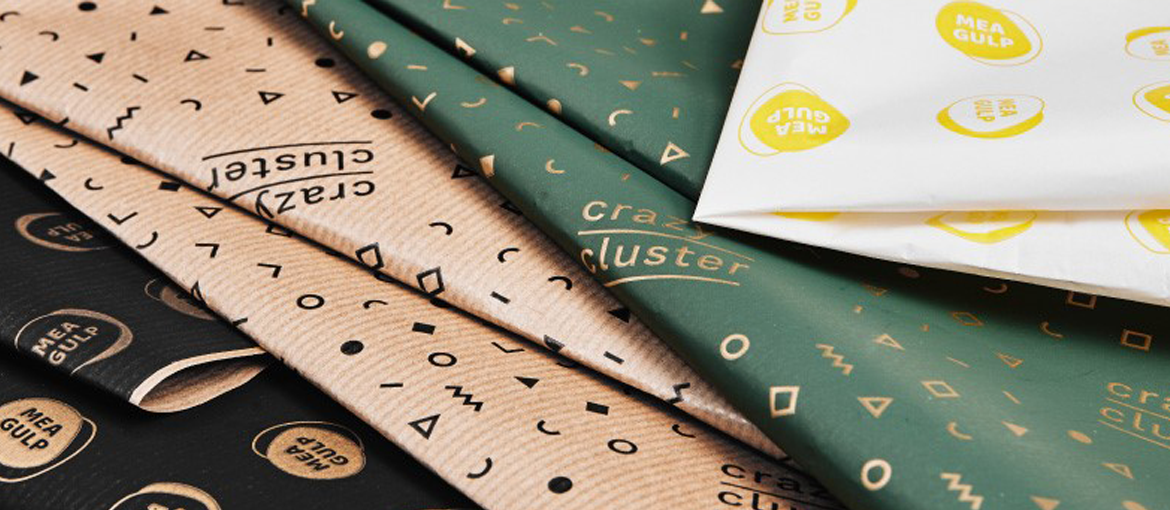
Patterns are an extremely useful design element and are used both online and in print. For example, we often see patterns on the back of business cards and on the covers of various types of leaflets.
They can enhance various printed items like posters, leaflets, flyers and banners. The use of patterns is also widespread in packaging, which benefits from this simple way of embellishing the design of printed materials.
Let’s see how to create a basic pattern using Adobe Illustrator.
1.Set up the working file
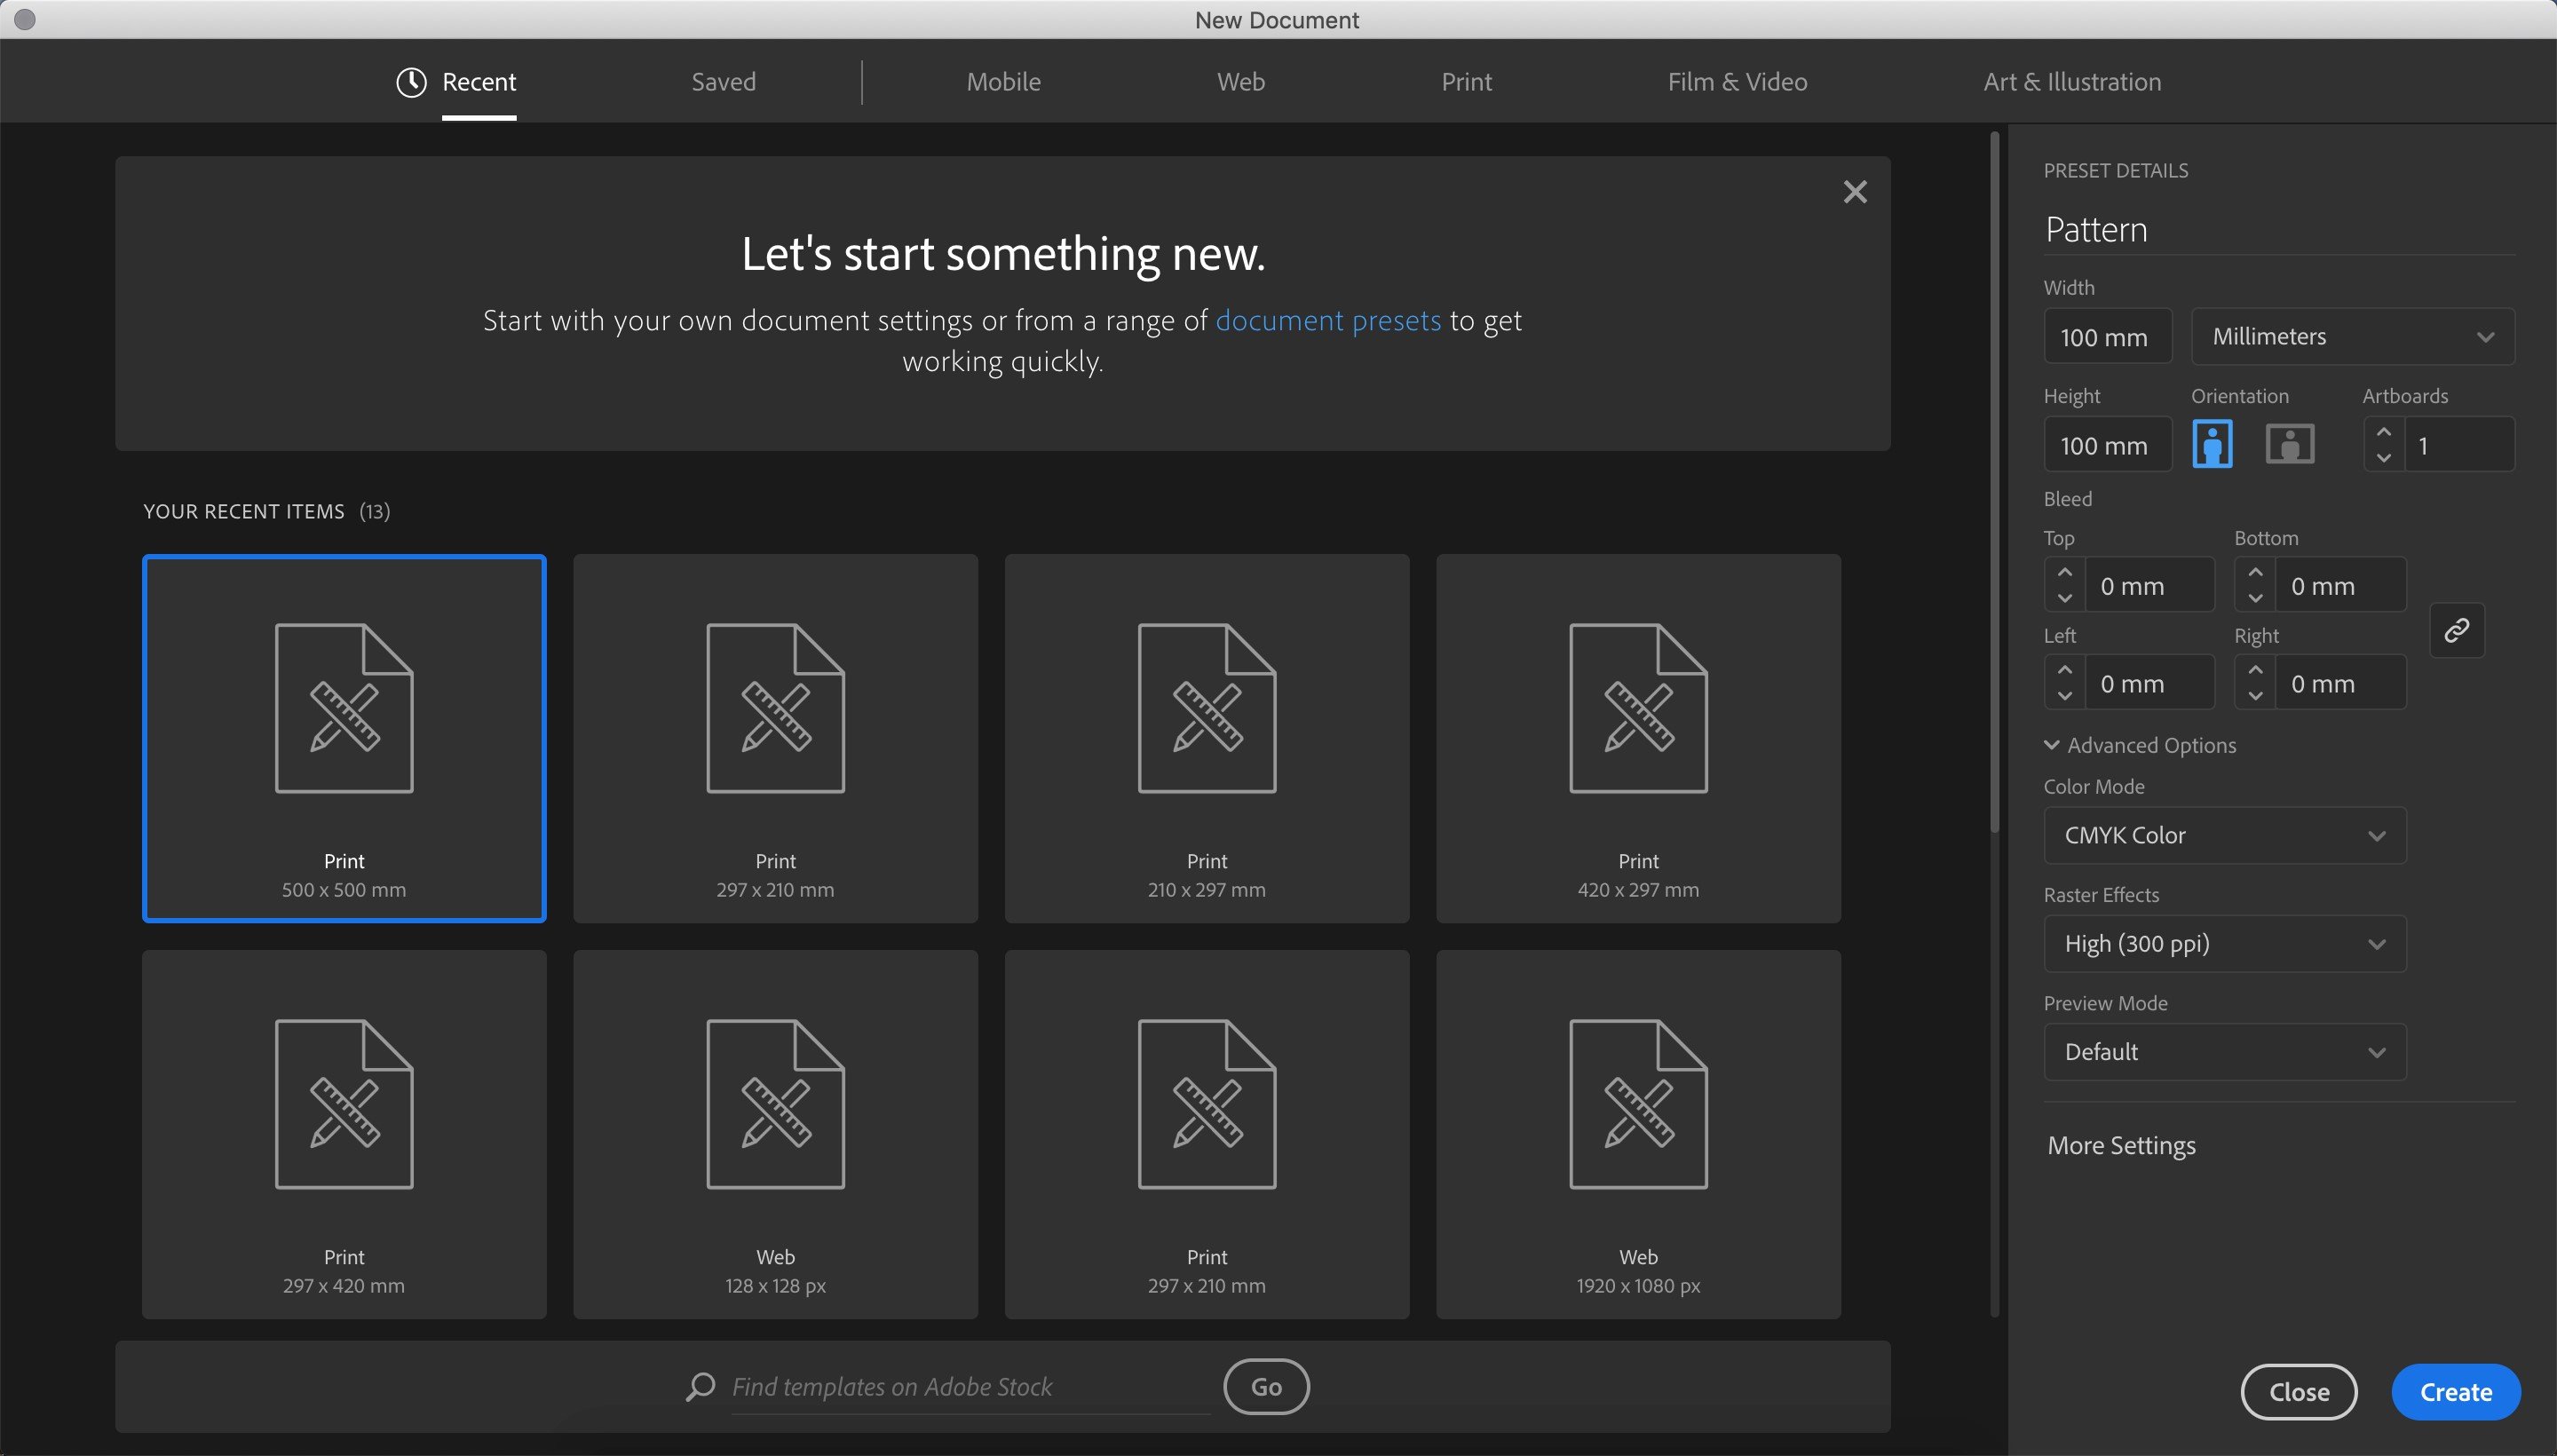
Start by opening Illustrator and creating a new file. You don’t need to set any specific dimensions, but you should choose the CMYK colour profile if the pattern will be printed.
2.Create a template to repeat
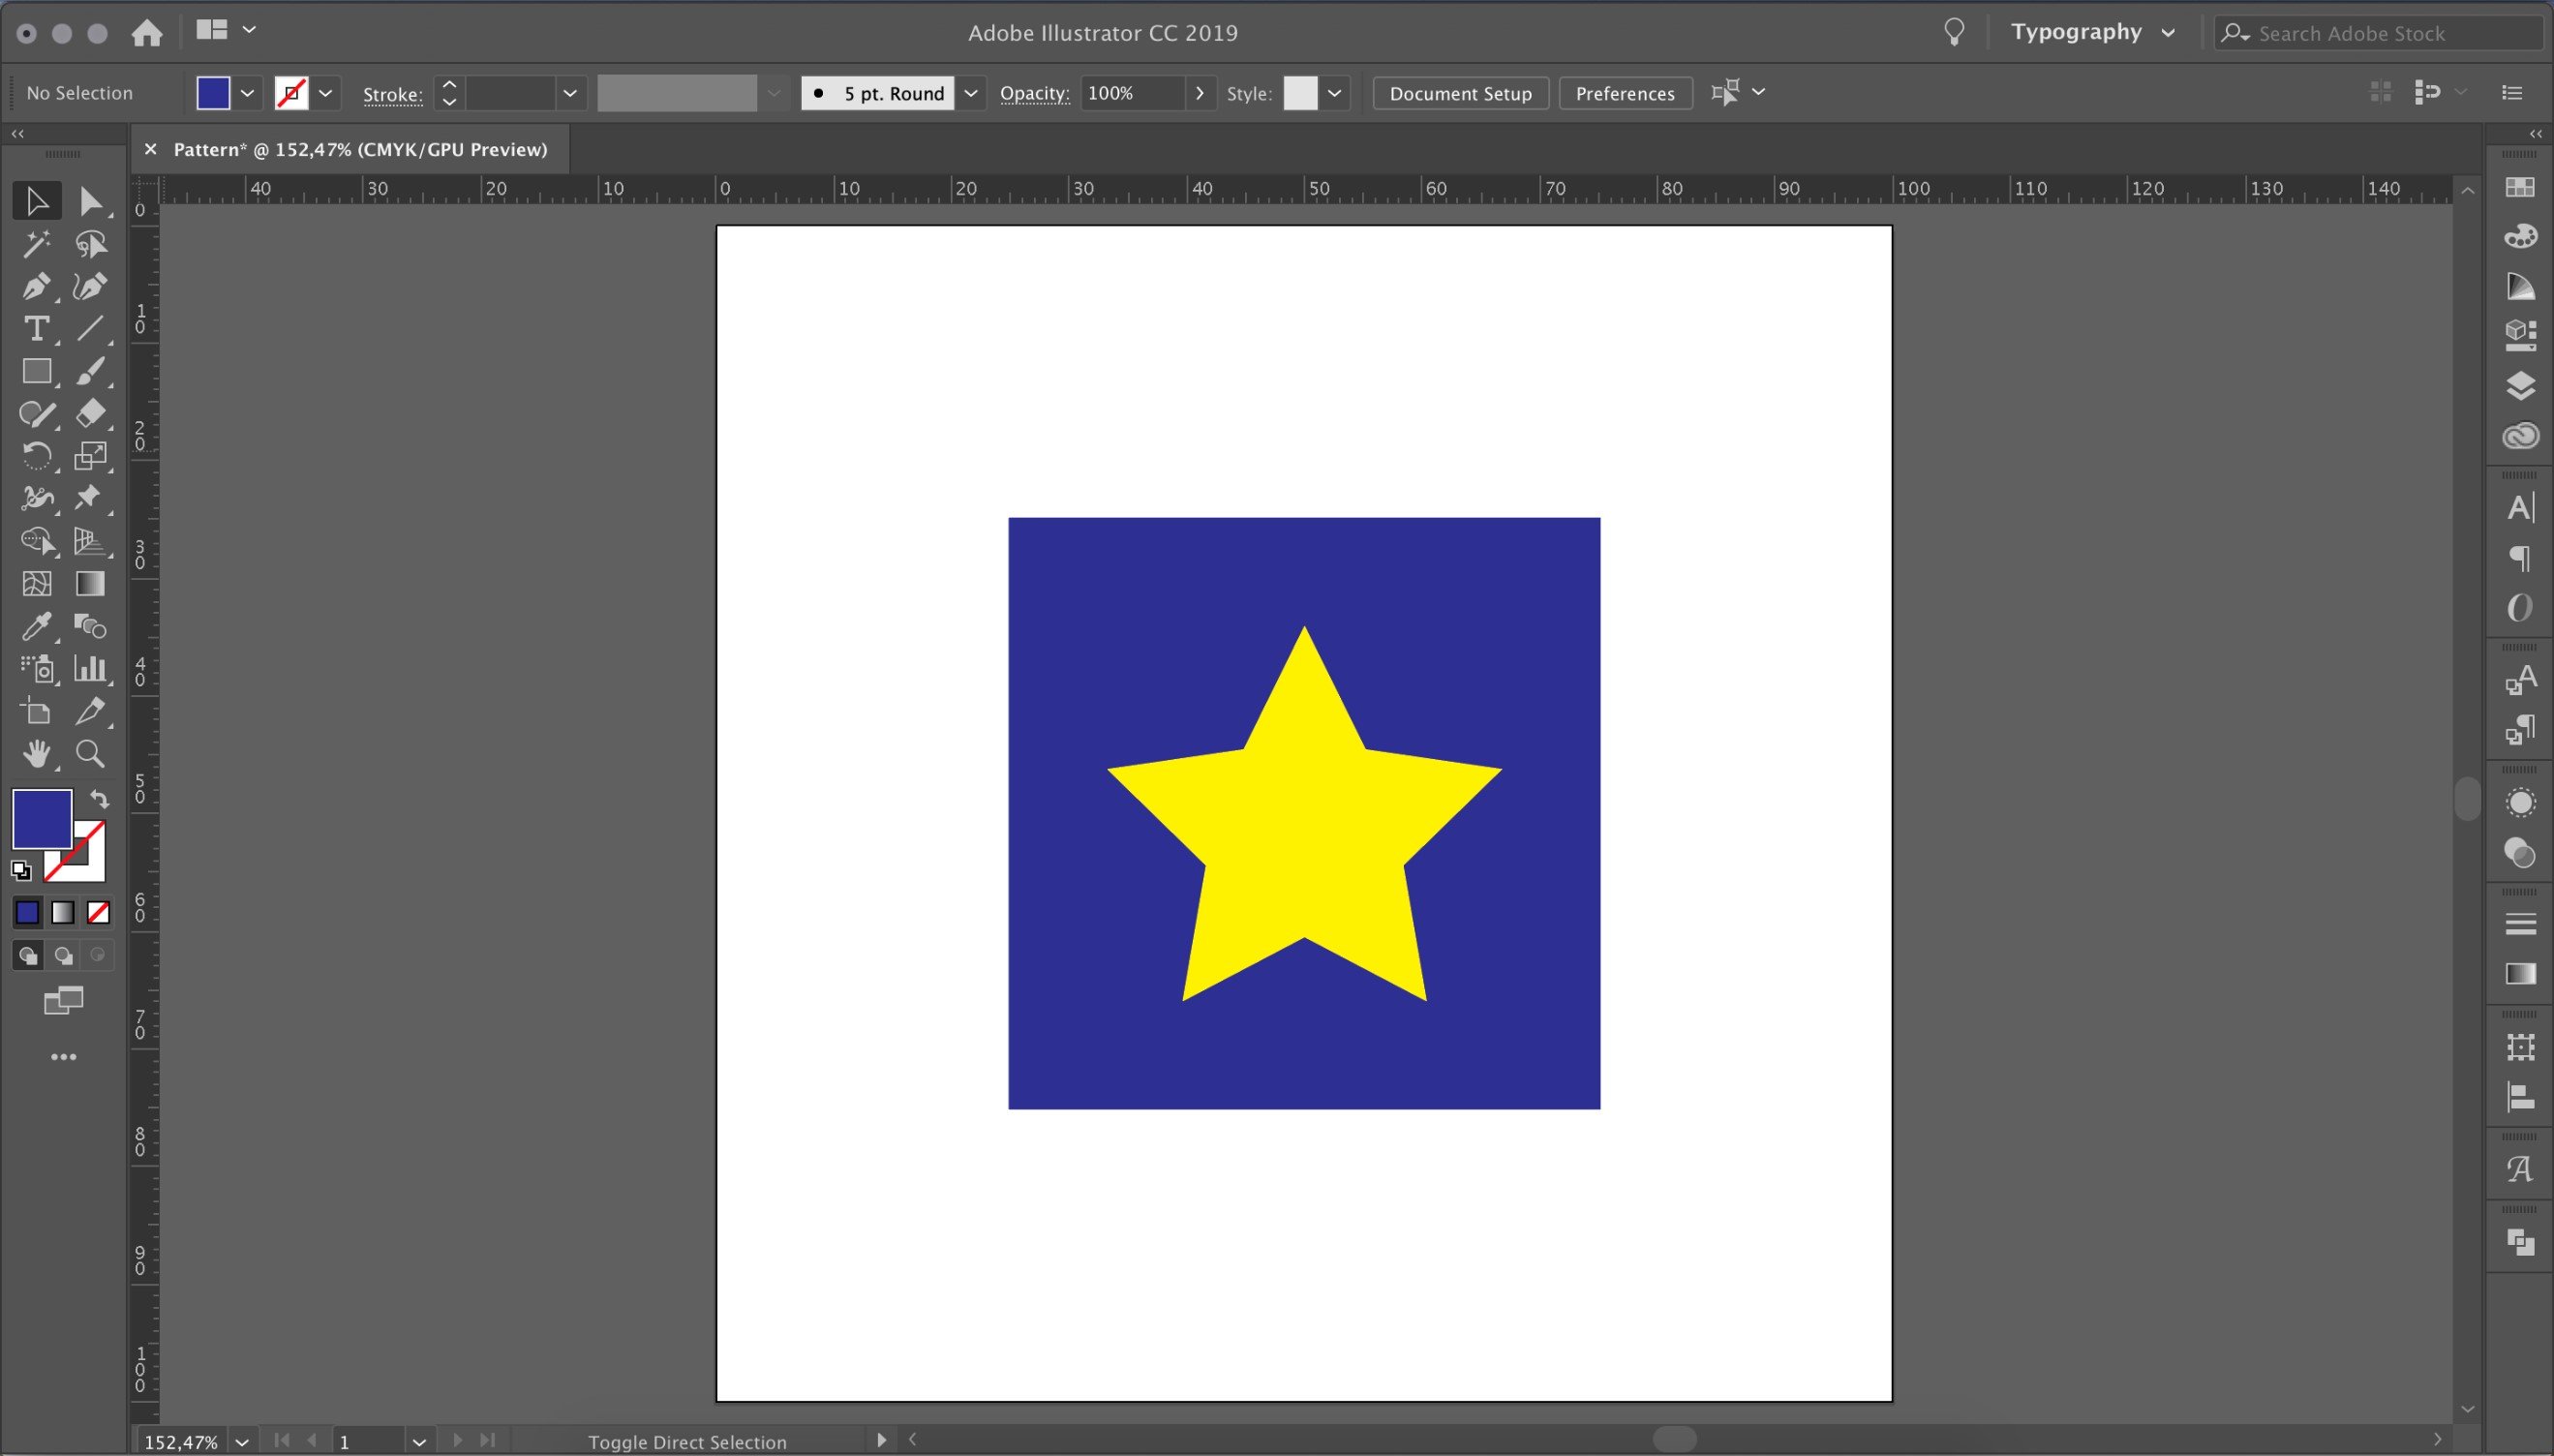
For this example, create a star using the “Star” tool in the left-hand sidebar. The five-pointed star does not have a border and is filled with the colour yellow. Now create a square that contains the star. Do this by using the “Rectangle” tool in the left-hand sidebar and holding down the Shift key as you draw.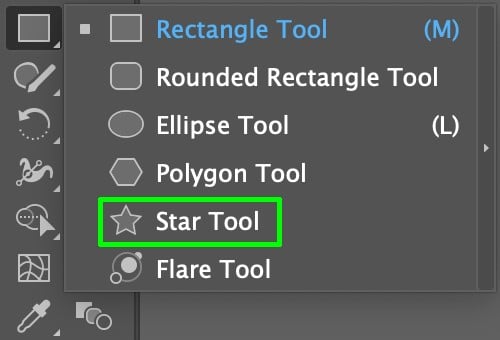
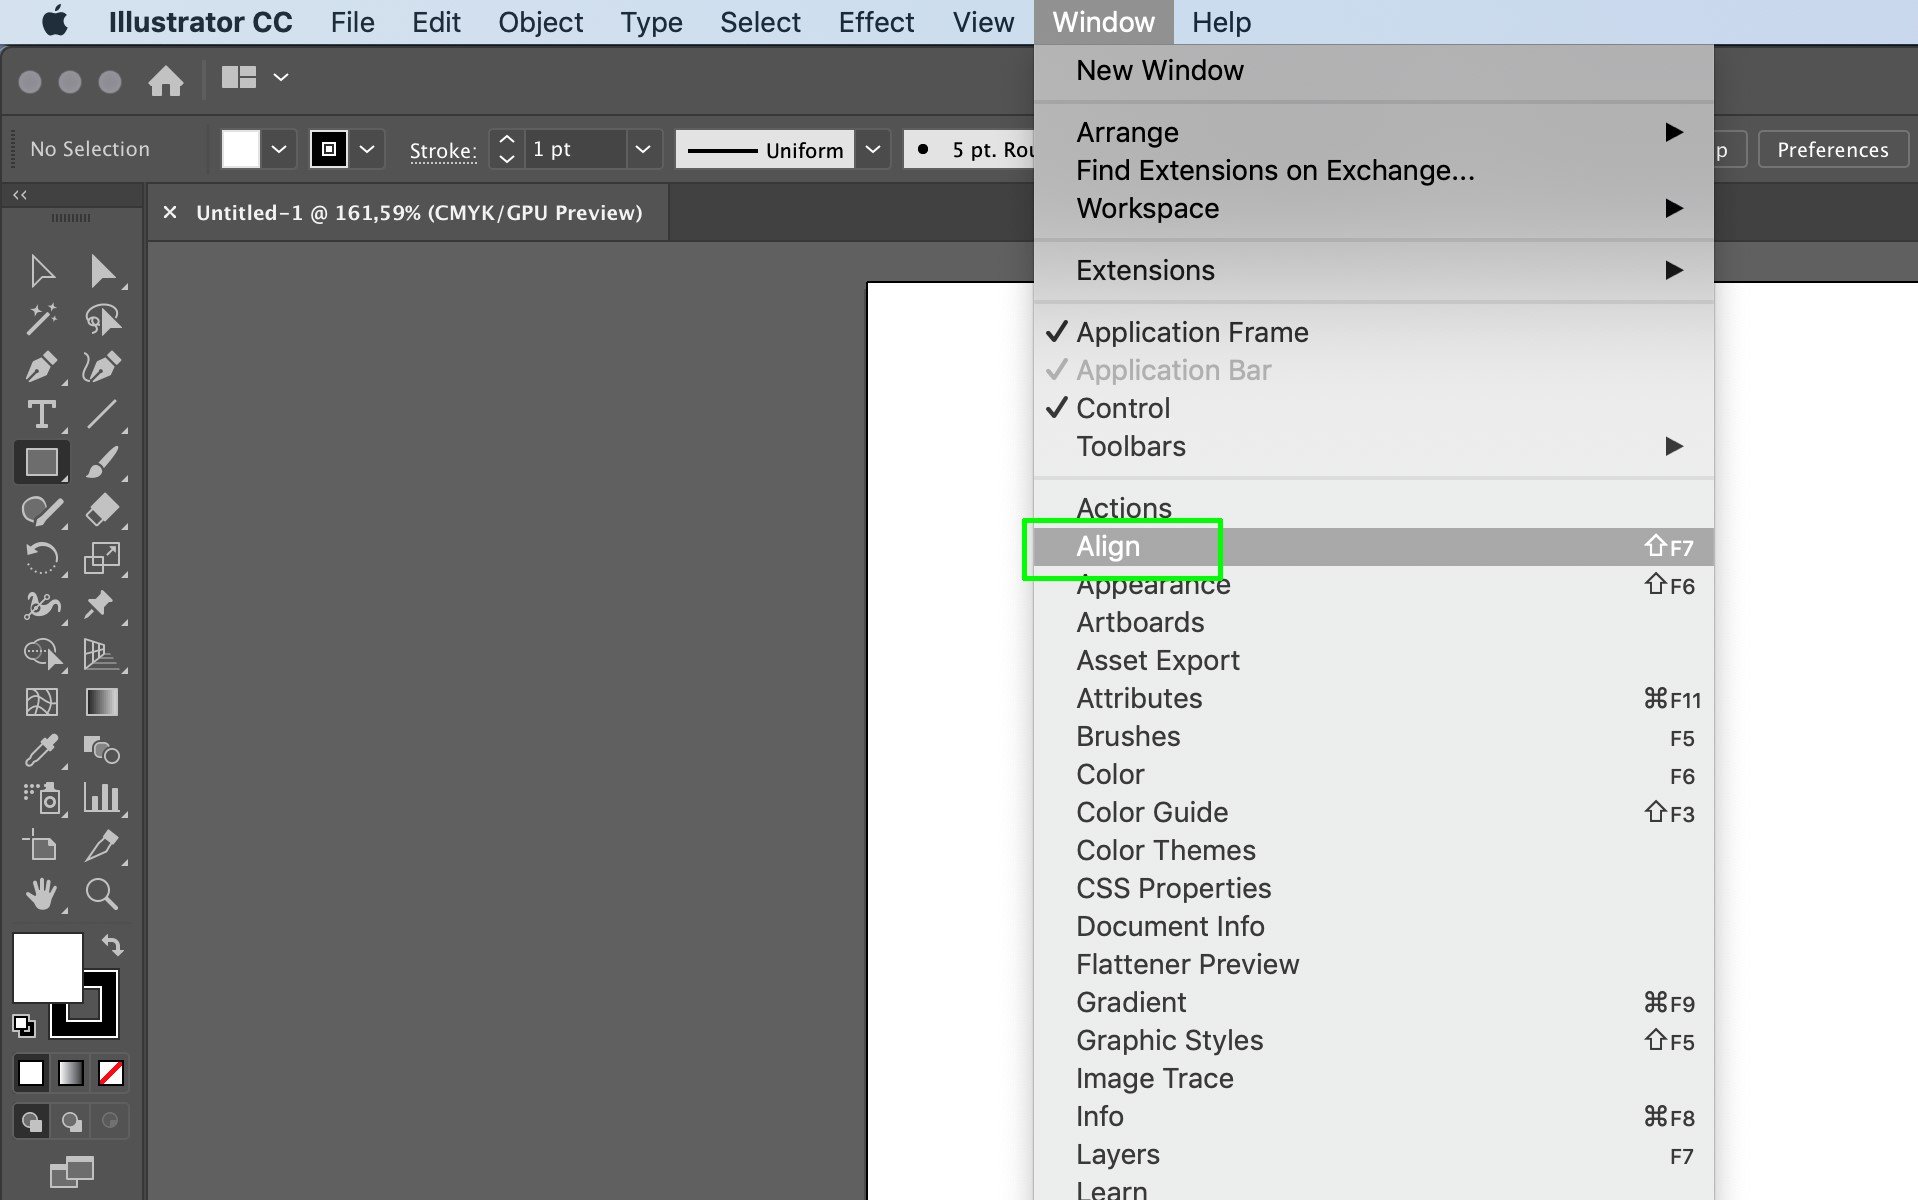
The star and the rectangle are centred on one another, which is achieved using the alignment tool (go to the drop-down menu beneath Window in the top toolbar and select Align).
The elements you’ve just created make up the template of our pattern. The complexity will be created by the geometric repetition of these elements.
3.Create the pattern
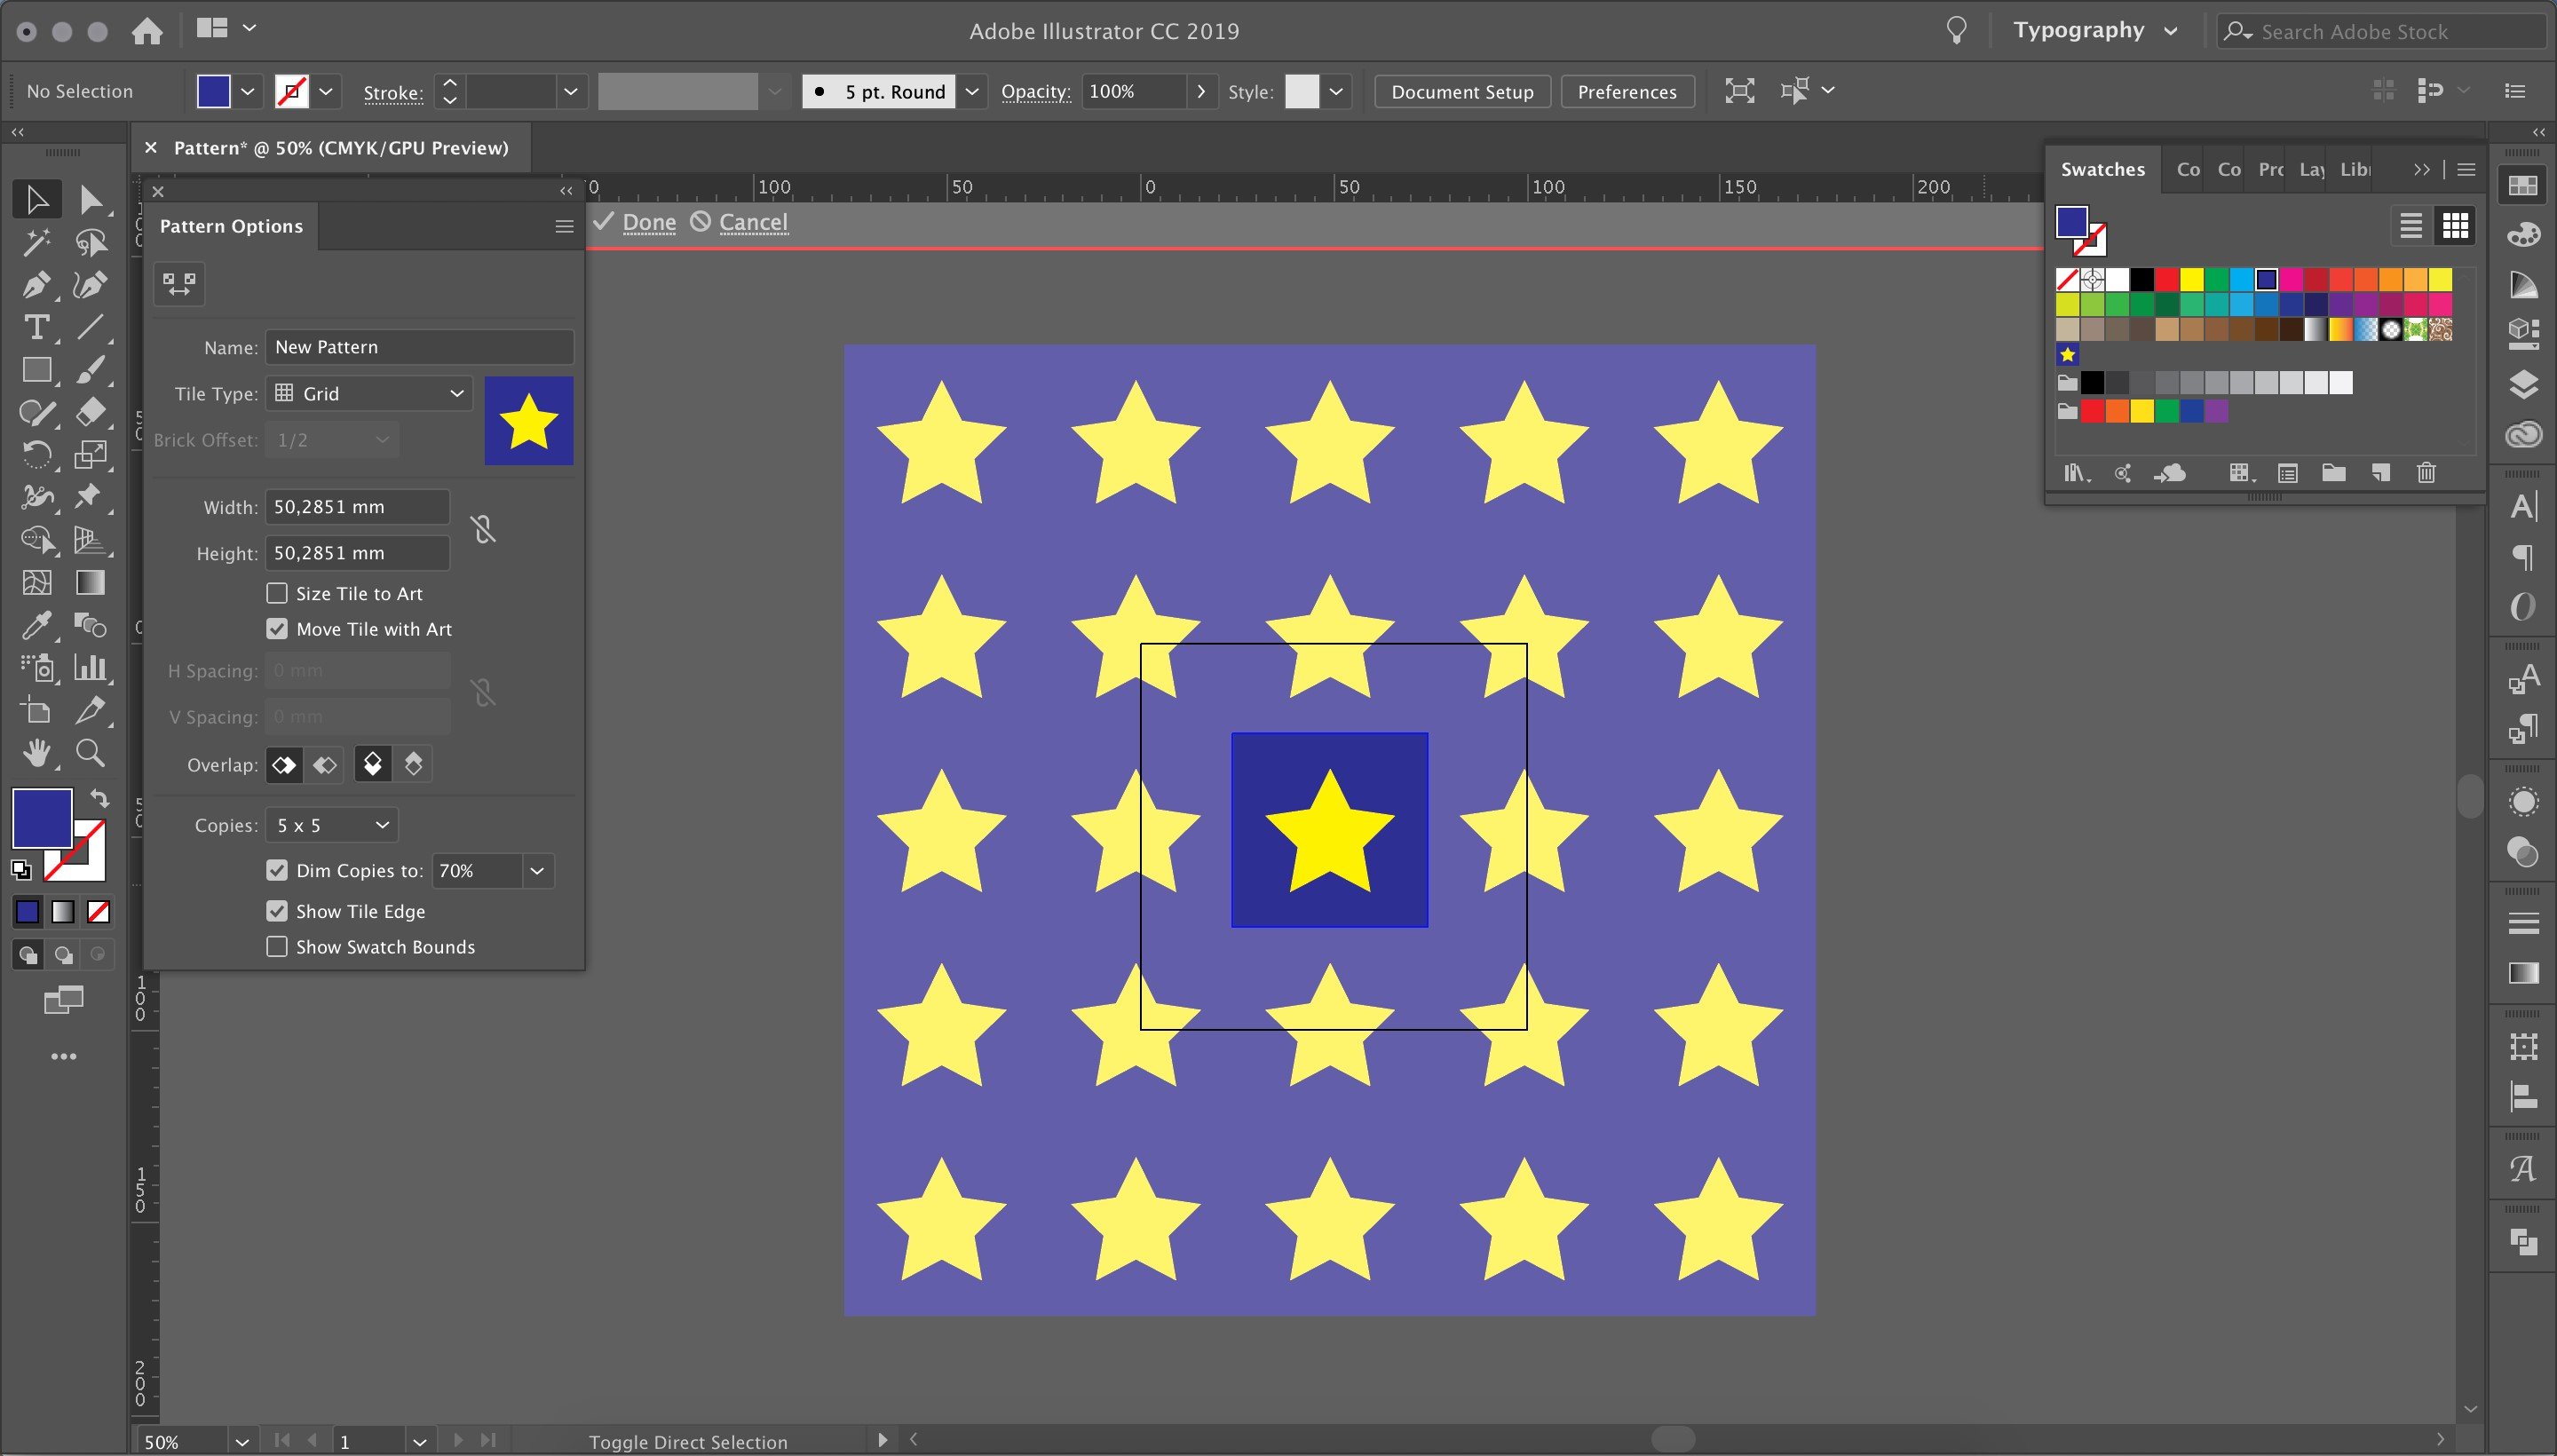
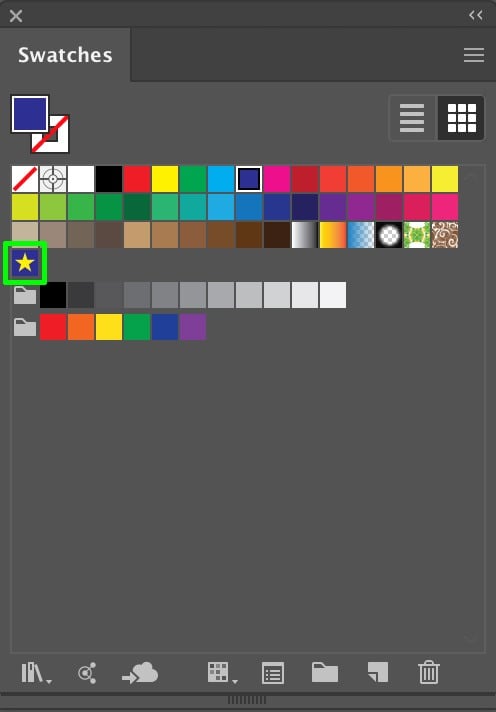
To make the repetition of our elements, select either the star or the rectangle with the cursor. In the top toolbar, beneath Object, select Pattern and then Make. A new window will open and tell you that the pattern has been added to the Swatches panel.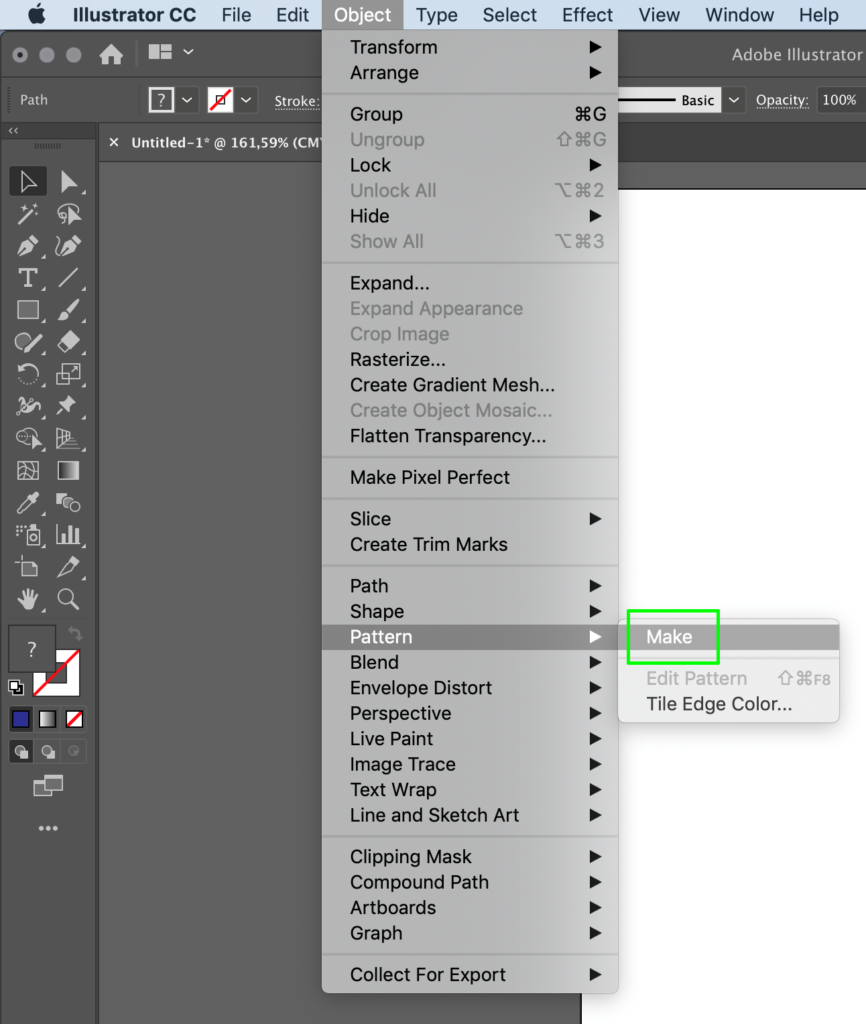
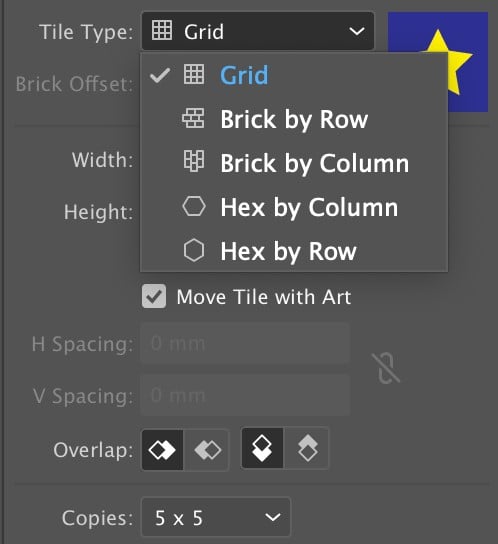
The Pattern Options window will now appear on the left-hand side. This allows you to name your pattern and configure how it is repeated (Grid, Brick by Row, Brick by Column, etc.). This option lets you create lots of different effects.
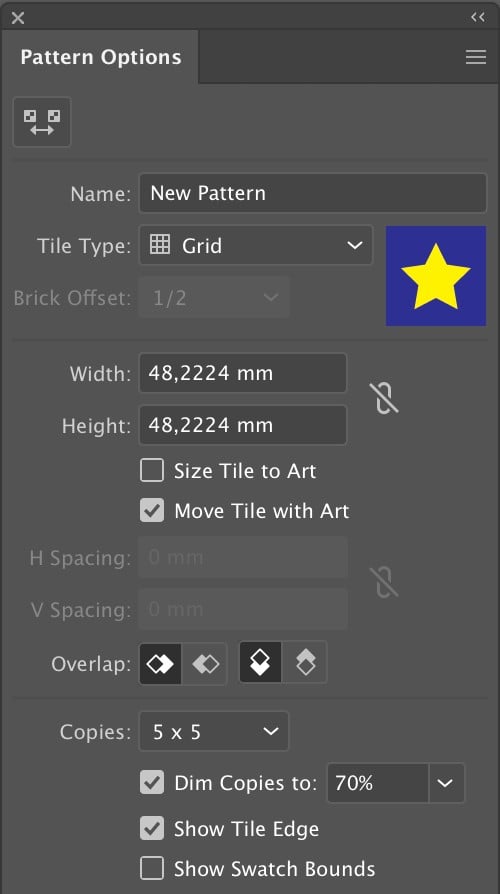
Pattern Options also allow you to set the dimensions and distances between the tiles (our templates), and to manage Overlap.
 4.Tweak the composition
As you’ll have noticed, changing the settings in Pattern Options affects the composition preview.
Now’s the time to experiment with different options to get a result you’re happy with. Remember that while you’re changing the pattern, you can always play with the original elements too. So you can reposition, resize and alter the shape of the star and the background.
Here’s a few examples of patterns made by experimenting with the various settings found under Pattern Options and by altering the original elements.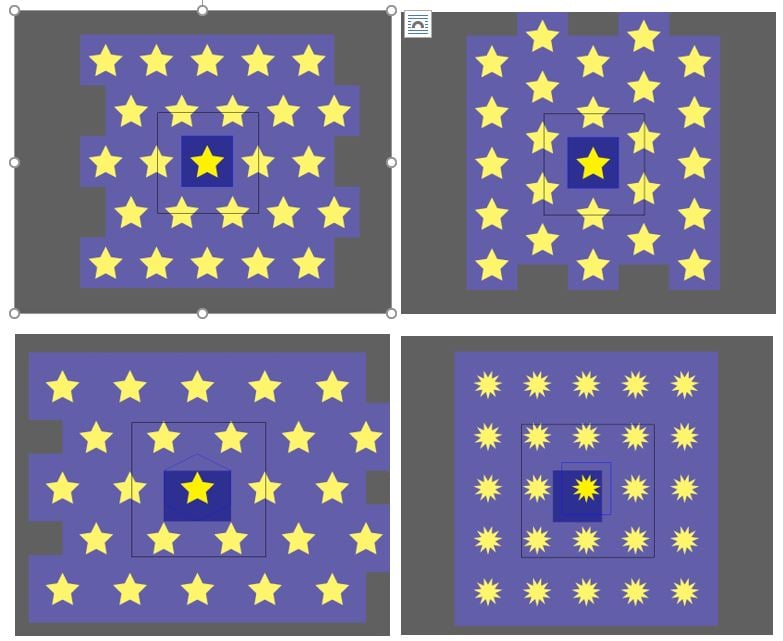
5.Save the pattern and apply it to surface
Once you’ve finished tweaking the original elements of the pattern, click “Done”. The pattern will be saved in the Swatches panel.
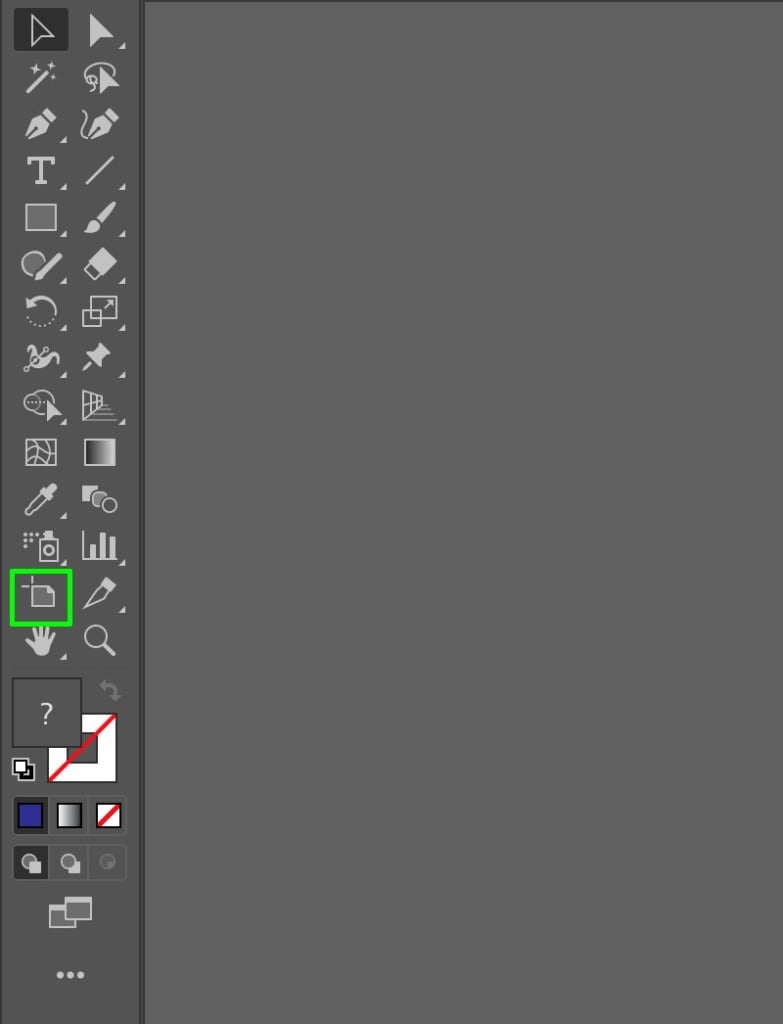
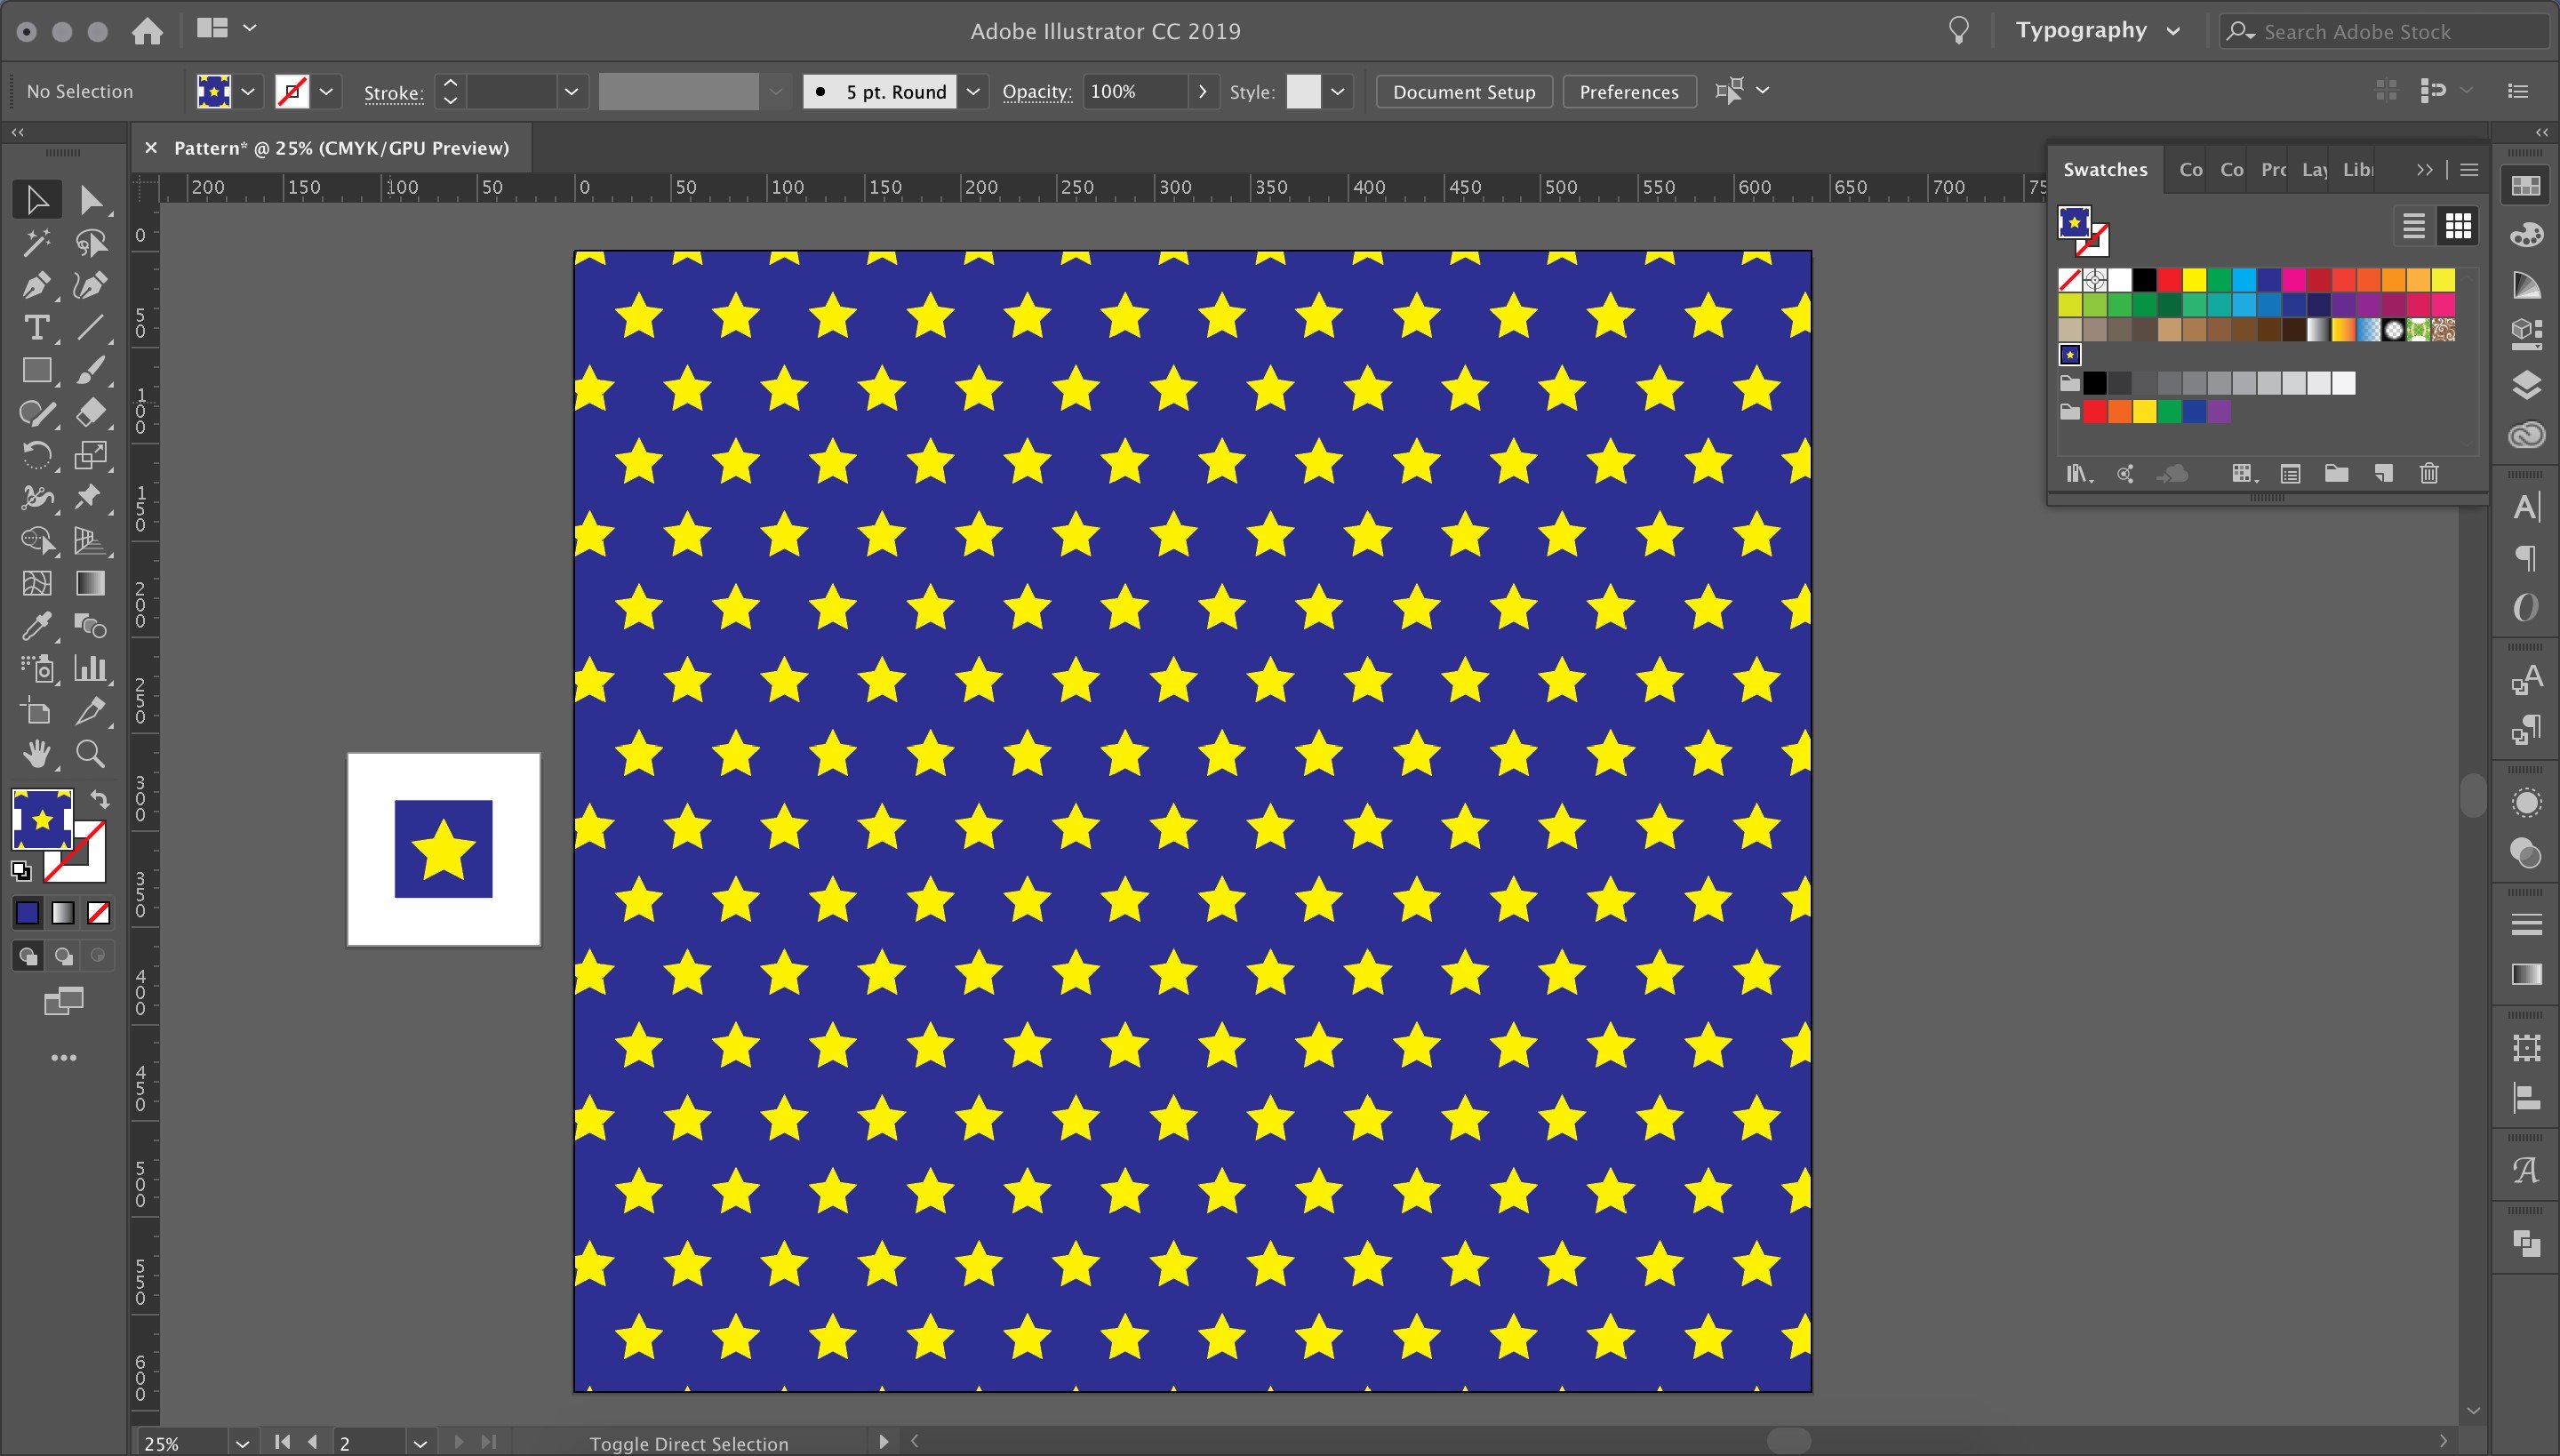
Create a new artboard using the left-hand toolbar by selecting the Artboard tool. In this instance, it needs to be much bigger than the original design so that there’s space to repeat the template.
Create a rectangle the same size as the new artboard. Using the Swatches panel in the right-hand toolbar, apply the pattern by filling the rectangle, clicking on the icon for the pattern itself.
And there you have it: a pattern that can be applied to any surface or geometric shape that you want!
The swatch that you’ve created can be used to fill almost any shape and can also be masked.
If you want to alter the pattern, simply double click on the swatch in the panel. This will take you to the Pattern Options screen.
Now you’re ready to play with your new pattern. Enjoy!