
Table of Contents
Let’s start with the basics: to maintain a professional online presence, it’s crucial to take care of the quality of the photos you use for communication. And by “taking care,” it’s not just about using images with extremely high resolution.
Keep in mind that when it comes to the images you upload online, overly large photos can appear pixelated and blurry (in addition to slowing down page loading and causing SEO optimization issues), just like low-resolution images. For each intended use, the right format, size, and weight are essential.
Today, we will focus on a crucial aspect: how to resize images. Here, you will find:
– A simple guide on resizing photos with Photoshop.
– 3 free online image resizing tools.
Why Are Images So Important?
The first impression people have of a brand is determined by the visual impact for 55% (Source: US Chamber of Commerce). The images you use in your communication play a significant role in the impression the audience forms about you or your business. To avoid negatively impacting your company, it’s crucial, if not vital, to present yourself well.
A Warning About Resizing Photos While Maintaining Quality
Our goal is to resize images without losing quality. To do so, having the right tools isn’t enough: when working with photos (rather than vector images), we can only maintain quality if we start with a very large image that we want to shrink. If we try to enlarge a small photo, it will likely become blurry. We can make slight adjustments, but to maintain quality, we cannot enlarge it too much.
Only vector images (such as logos and illustrations) can be resized without limits.
How to Resize Photos with Photoshop
Do you have the Adobe package installed on your computer? Then you can’t go wrong: use Photoshop to resize your images. It’s the best tool at your disposal.
Here’s what you need to do:
1. Open the image you want to resize with Photoshop.
2. From the menu, click on “Image” and then “Image Size.”
3. Set the height, width, or resolution and choose the unit of measurement (pixels, centimeters, etc.). An important thing: to maintain aspect ratios, make sure the “Constrain Proportions” button is active.
4. Once you’ve set the parameters, click “OK” to apply the chosen dimensions and save the resized image.

Stop. You’re done. And for those who don’t have the Adobe package?
Resize Photos Online for Free: 3 Recommended Sites
Online, you’ll come across a plethora of tools to resize your images with a click. How do you navigate this? Which one should you choose? We have 3 to recommend.
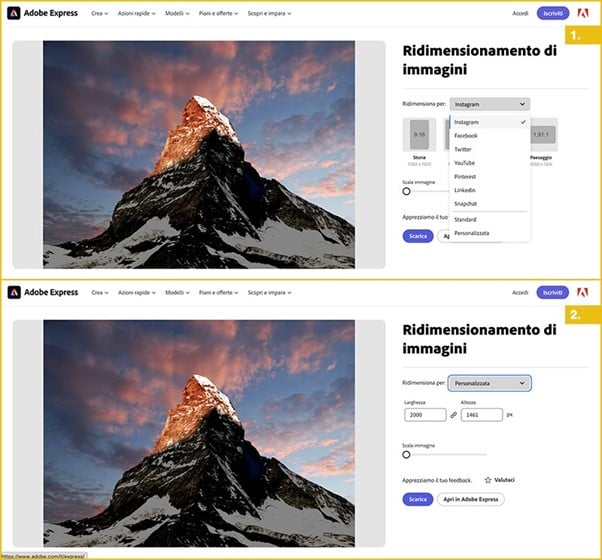
Adobe Express
We’ve already talked about Adobe Express in our article on background removal in images. Well, this Adobe tool, 100% free, also allows you to adjust the dimensions of any photo in just a few seconds, making it smaller, vertical, horizontal, square, or tailored to your specific use—whether it’s for the web, a LinkedIn profile picture, a Twitter banner, or a YouTube thumbnail. Alternatively, you can set custom dimensions.
To resize or shrink a photo, follow these steps:
1. Upload the JPG or PNG file to the platform.
2. Choose your intended use or set custom dimensions.
3. Download the resized image or continue to edit it. At this point, if you haven’t already, you’ll be asked to register (registration is free).
BeFunky
BeFunky is also a very intuitive program that allows you to resize images online for free. The tool also offers photo editing, the ability to create graphic projects, or make photo collages (not all of these functions are available in the free plan).
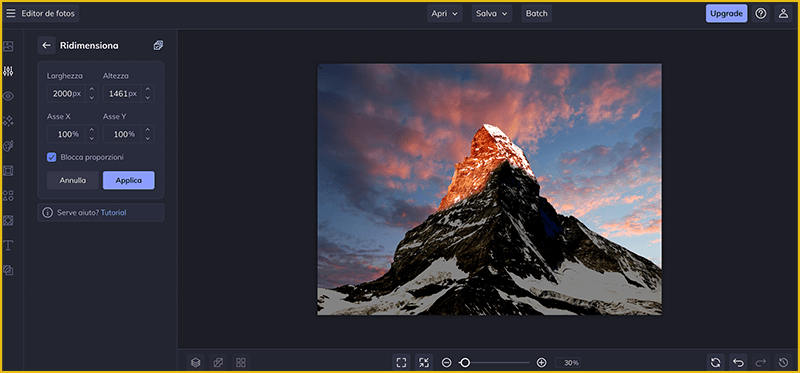
Here’s how it works:
1. Upload your image into the editor.
2. From the menu on the left, select “Resize.”
3. Set the desired dimensions, ensuring the “Lock Aspect Ratio” option is checked, so the image maintains the correct proportions.
4. Click “Apply,” and you’re done.
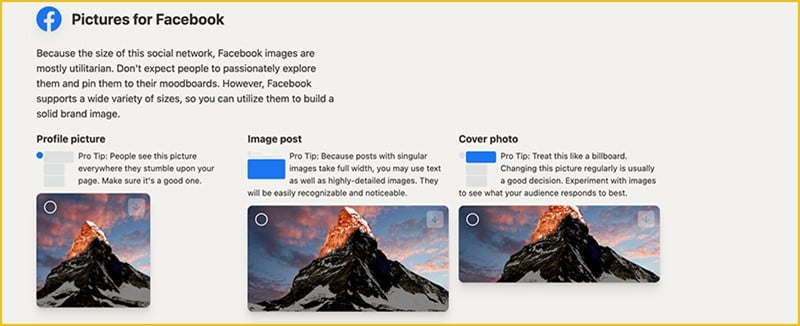
Pixelhunter
The last tool we recommend is Pixelhunter, specialized for social media. This tool allows you to automatically resize images for social platforms. Its artificial intelligence helps you crop images without compromising the composition’s balance. Moreover, the platform provides valuable suggestions for creating harmonious and well-balanced graphics. You can use it to resize images (or videos) for posting on Facebook, Instagram, Twitter, YouTube, TikTok, Open Graph (the tool supports 102 different sizes).
How does it work?
1. Upload your file.
2. Click on “Add.”
3. Automatically receive the resized image for all the social platforms supported by Pixelhunter.
4. Click on the images you want to download.
Here’s an example of a resized photo for Facebook formats.
And this is just the first step in taking care of your online and offline presence. The next step is building a strong and recognizable brand identity. If you want to delve deeper into the topic, we leave you with the article “Visual identity: how graphic design changes perceptions of your brand.”