

Table of Contents
Take a magnifying glass and examine a printed product closely: you’ll immediately notice that what seemed to be a continuous image – for example what our eyes perceive when looking at a panorama – is in reality made up of lots of tiny dots. This effect is sometimes visible to the naked eye, for example, in newspaper photos.
The truth of the matter is, we can only print dots. These dots, when printed on paper with the right size and frequency, are perceived by our eyes and processed by our brain to recreate a continuous image. So even printing – like cinema – relies on optical illusion.
The technology that enables the correct positioning of these dots is the halftone screen and today we’re going to tell you all about it!
How halftone screens work in printing
The technique that first allowed the printing of a continuous image using small dots was devised in the mid-19th century. Many worked on developing this technology, but the most commercially successful patent was filed by German Georg Meisenbach, in 1882.
To explain how halftone technology works, we’ll start with a simple example: imagine we have a printer that uses a single colour, black, and we want an image in which black fades to white. Something like this.

The printer can only do two things: print in black colour or not print at all, in other words leave white space on the paper. To create the shading that you see in the image above, we need to use halftone technology.
Where the black tone is darkest, the black dots are larger (or more frequent, as we’ll see shortly), and as we move towards the white area, the dots get smaller.
This is the basic principle behind halftone screens, put very simply. But in reality, things are more complicated: there are different types of halftone screens and the choice is based on a range of parameters, such as the type of printing and the paper used.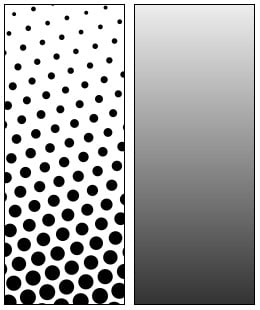
Now let’s look at the two main types of halftone screening: conventional screening and stochastic screening.
Different types of halftone screens
Conventional single-colour screening
In conventional screening, the dots always remain at the same distance from one another, varying only in amplitude, in other words, size.
The bigger the dot, the darker the tone and the smaller the dot, the lighter the tone. And remember, the size of the dots is in the order of microns, which means that the naked eye only sees a change in shade.
Stochastic screening
In stochastic screening, it is not the amplitude, but the frequency of the dots that changes: where dots are more frequent, the tone is darker and where dots are less frequent, the tone is lighter.
Stochastic means “random”: the dots are positioned with greater frequency and in no set pattern, resulting in shading that is more natural and of a higher quality.
Colour and moiré patterns
We’ve seen how halftone screens are used in black and white printing. But what happens when we use colour? As you know, we usually print in 4 colours (cyan, magenta, yellow and black) which recreate the desired tone. But these four colours aren’t mixed together as they are in, for example, painting: instead, a series of dots in these four colours are printed next to one another. Again, the screens vary the dots’ amplitude or density, making the four colours overlap.
If the four screens do not overlap correctly, this may create what is known as a moiré pattern: an interference pattern that causes an undesired visual defect.
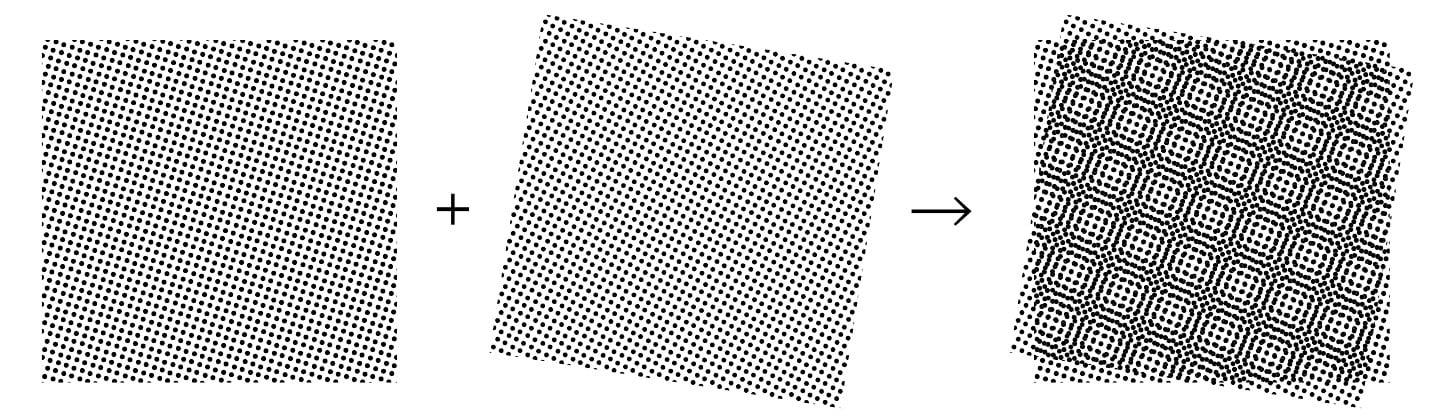
To prevent this problem, the four colour screens are rotated at different angles or their frequency is varied.
So that’s how an apparently simple technique is used to print shades and colours, letting us create all the images we want! Who’d have thought so?