
Table of Contents
Your image is ready to be printed and looks clear and sharp on the screen, but once printed onto your chosen material, it appears pixelated and low quality, ruining the effect. What happened? In cases like these, understanding resolution and its implications when printing is essential to avoid wasting money on a poor result.
So what exactly is image resolution?
The resolution of an image is the number of pixels it contains. It is usually given in pixels per inch (PPI) – the higher the number of pixels in an inch, the more information there is, and therefore the more detailed and sharp the image. When there are few pixels per inch, the image has a grid-like appearance, with all the pixels visible.
However, an image’s PPI does not mean much without any context. It must be used alongside other parameters for a full understanding of the situation and to ensure you achieve the required print quality.


Parameters to bear in mind
Image width and height
The PPI value is always connected to the image’s width and height, which are expressed in pixels (picture elements). Unless the image is resampled (an operation we will look at later), the relationship between the image’s dimensions and its resolution remains constant. For example, a 2000 x 1000 px image at 72 ppi has a same quantity of information and quality as the same image with 480 x 240 px and 300 ppi.
It is important to remember that a pixel is a digital, not a physical unit of measurement: it therefore does not have a corresponding length in millimetres or centimetres, but instead is a minimum unit, which depends on the type of screen being used.
File size
An image’s resolution and dimensions in pixels determine the file size – given in kilobytes (KB), megabytes (MB) or gigabytes (GB) – which indicates the amount of disk space the image will use. The higher the number of pixels in an image, the more clear and detailed it will appear when printed at a certain size. At the same time, increasing the number of pixels also increases the file size, so it will take up more disk space and take longer to process and print.
Screen resolution
The screen used to look at images also has a certain resolution, given in pixels. Generally, the larger the screen, the higher the resolution. As with images, screens have a finite number of pixels per inch, often 72, but potentially much higher in latest-generation models.
If the resolution of an image, let’s say 1024 x 768, matches the screen resolution exactly, it will be displayed at 100% scale. If the PPI matches too, the image will appear clear, but as you zoom in, the details will begin to blur.
When preparing images to view on a screen, you need to consider both the final size of the image and the PPI of the screens on which it will be viewed. When preparing images for the web, it is often very useful to use a compression format, such as JPG, to avoid the file size being too large (and therefore taking a long time to upload), while maintaining the size of the image in pixels, and so ensuring the quality remains high.
Printer resolution
To describe the resolution of a printer, you can’t use PPI (pixels only make sense as a unit on screens) – DPI (dots per inch – the number of dots of ink per inch) are used instead.
In general, the higher this value, the greater the level of detail of the prints.
PPI v DPI
PPI and DPI, the screen resolution and printer resolution, are separate values, but there is a connection between the two. The standard value for a high-quality printer is 300 ppi. An inkjet printer can achieve good results at 220 ppi, but it is best to never go below 150 ppi, as the pixels will be clearly visible, and what was a crisp image on screen will appear at best ‘furry’, or even pixelated.
The resolution required for a sharp image also depends on the type of material onto which you are printing. For example, any imperfections will be much more visible on a glossy coated paper than on canvas, so a much higher resolution is required for the former than for the latter.
Image compression formats (BMP, TIFF and JPG)
If you want to maintain a high image quality but avoid it taking up too much space, compression is the answer. Some formats, like TIFF and BMP, do not involve compression, and retain all of an image’s pixels. These are ideal if the quality of the image is the number one priority, regardless of how much space it takes up. If, however, you want to reduce the file size, you can decide to use a compression format such as JPG, which also allows you to determine the extent of the compression. The JPG compression technique works by analysing the image in blocks of pixels and reducing the number of pixels in each one. How effective it is depends on the subject and the amount of detail and colour in the image.
JPG compression leaves the physical size of an image unaltered and reduces the disk space it takes up, but it must be done carefully, bearing in mind what the image will ultimately be used for, because it involves sacrificing the quality and sharpness.

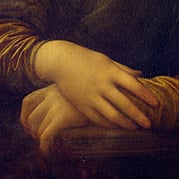
The same image, with the same resolution (150 ppi) and dimensions (259 x 295 px) but different JPG compression factors. Although they have the same number of pixels, the grid of squares used to compress the image is clearly visible in the right-hand image.
How to improve image resolution
What can you do when the resolution of the image you want to print is too low for your chosen size? The short answer is that, unfortunately, there is nothing you can do. Nothing looks more amateur and sloppy than a pixelated image printed at low resolution. The best option is definitely to make the image smaller, until the resolution is suitable for printing.
However, if you really must use a low-resolution image at a certain size, there are some tricks that may help to improve the results. They will not solve the problem, but they may help to minimise the damage.
1.Resample the image.
Resampling can be done on Photoshop, and involves changing the number of pixels in an image. It can be done to reduce the image resolution and so make the file smaller, but it can also be used to increase the resolution. Although this may seem like the perfect way to get around the issues caused by image resolution, it doesn’t actually give the image more detail or improve its clarity. Instead the software generates new pixels based on the existing ones, and ‘guesses’ which colour they should be.
This can be a useful way to avoid a clear grid of pixels, but the image will remain grainy. It can be useful to add some noise in post-production, but in general it is better not to abuse this trick, and to test whether it actually improves the image’s appearance.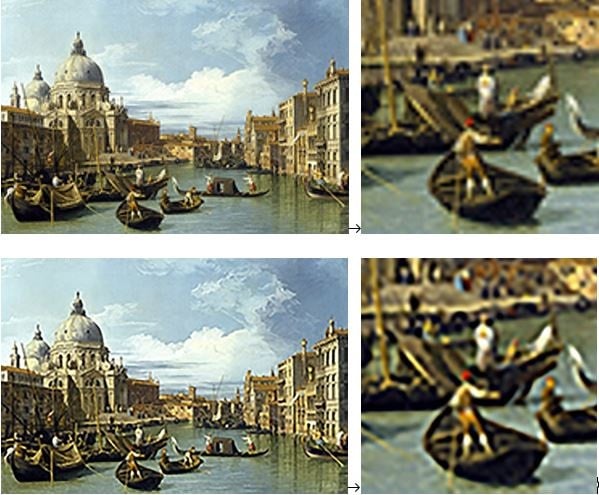
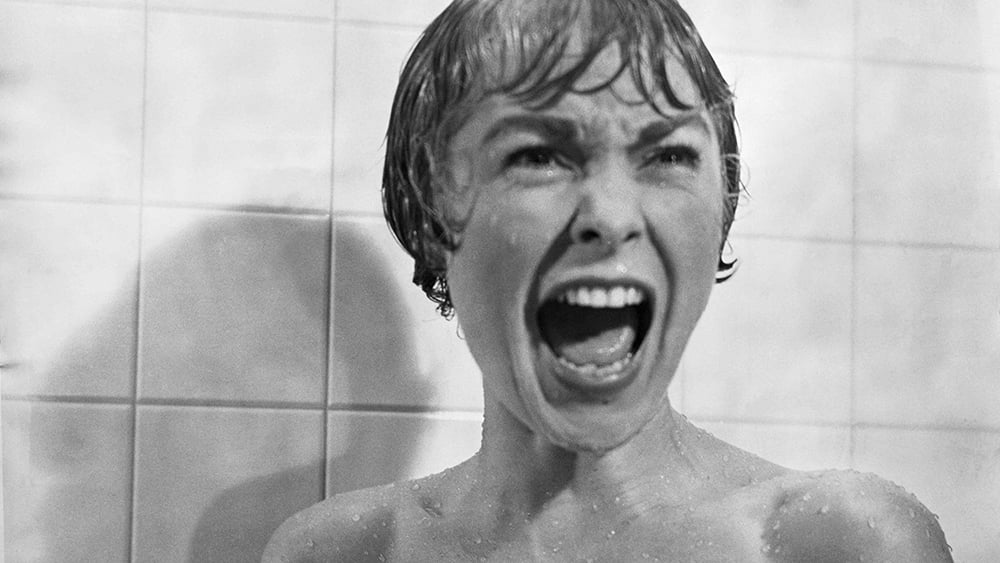
The same image, at 216 x 147 px and 72 ppi (above), and at 1500 x 1021 px and 300 ppi, after resampling (below), with enlarged detail. As can be seen in the enlarged image, the resampled image does not have more detail; it just has more pixels.
2.Use a halftone screen.
Another option is to keep the original image but to apply a particular filter to avoid the grainy or pixelated look. A halftone screen is a filter that can be applied using Photoshop, which involves dividing the original into small printing areas of the same colour. Of course, this is not a suitable option for all types of images and photos, but it can be useful for black-and-white images.
The same image, with a halftone screen applied (below). 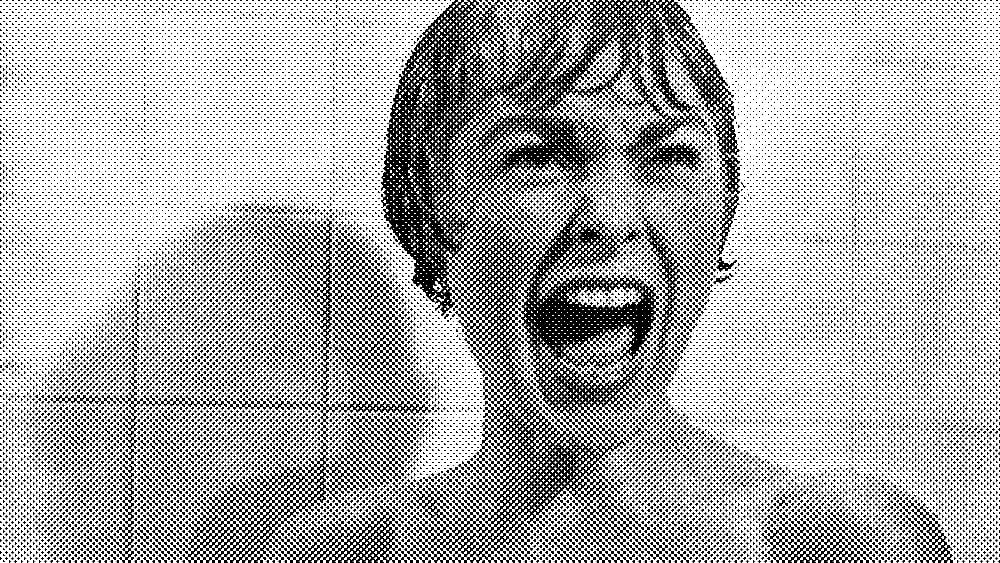
3.Print and scan the image.
One final thing that is worth trying is to print the image at a size with a good resolution and then scan the printout at a high resolution, so it can be used in a larger size.
Enlarging the scanned image will mean the dots of ink will be visible, but while this is not ideal, in many cases it is better than being able to see the grid of pixels.
Unfortunately, there aren’t many shortcuts when the resolution of an image is too low. The most important thing is to understand how resolution works and the effect it has on printed items. In many cases it will be clearly apparent that changing the image and choosing one with an appropriate size and resolution is essential if you want to create an effective and professional-looking printed object.