Table of Contents
Packaging has two purposes: one is functional, the other aesthetic.
On the one hand, it contains and protects products, and makes them easy to transport. On the other, it makes them more attractive and strengthens their brand’s visual identity.
Lots of companies specialising in printing and packaging offer a wide variety of formats and structures. There are, however, designs that require special measurements and materials for which standard formats won’t do.
The template for a box is its two-dimensional technical drawing, the outline that allows the box to be assembled. A template comprises two parts:
- The die cut lines: in other words, the silhouette that will be printed and cut
- The creasing lines: these show where the edges of the box will be – this is vital for assembly – as well as any other additional elements.
So how do you create a packaging template that works and is ready to be sent to a professional printer? We show you how to create a template for one of the most common types of box using Adobe Illustrator.
Creating a packaging template for a standard box
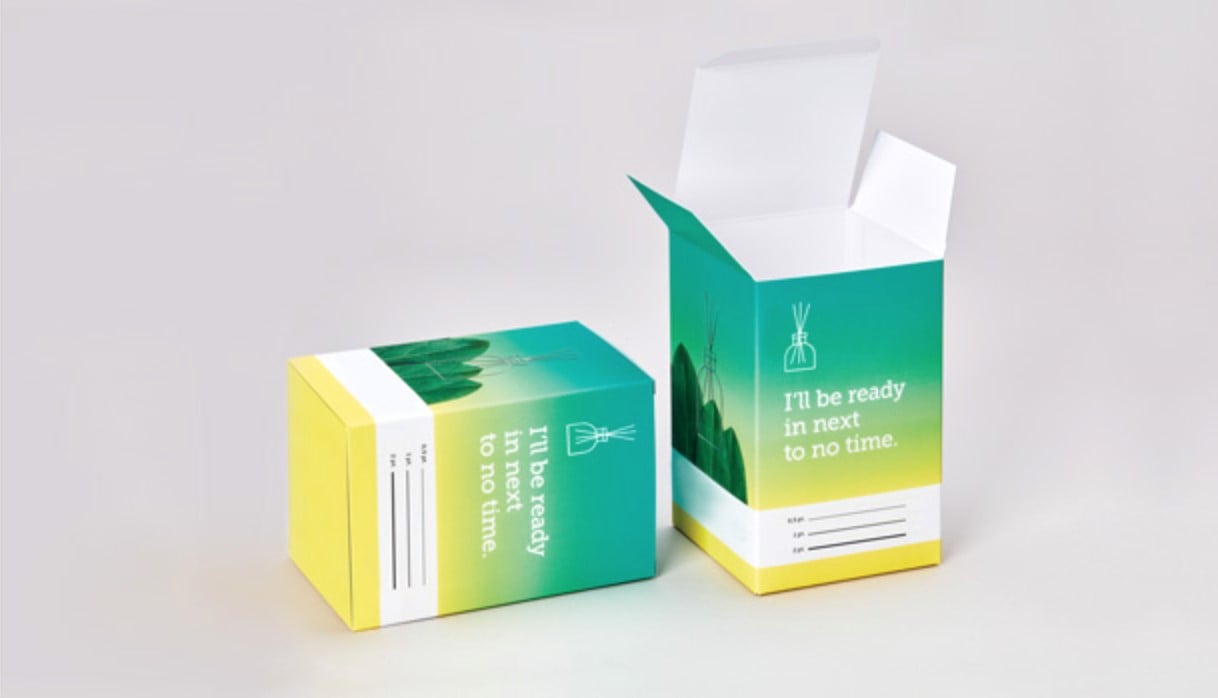
The template that we’re going to create is for a standard box made by cutting and folding a single sheet. It can be closed by slotting its various parts together, and has a glue point. The glue point is the only part to which the printers will apply liquid glue and it allows the structure to remain solid.
Creating a new document with Illustrator
First of all, open Adobe Illustrator. When you create a new document, you have to enter the dimensions for the artboard. For now, just set them to 500 x 500 mm; this will be changed once the drawing of the box is finished. Ensure that the Colour Mode is set to CMYK. It’s important that any project that will eventually be printed is set to cyan, magenta, yellow and key (CMYK).

1.Creating the box’s 4 side panels
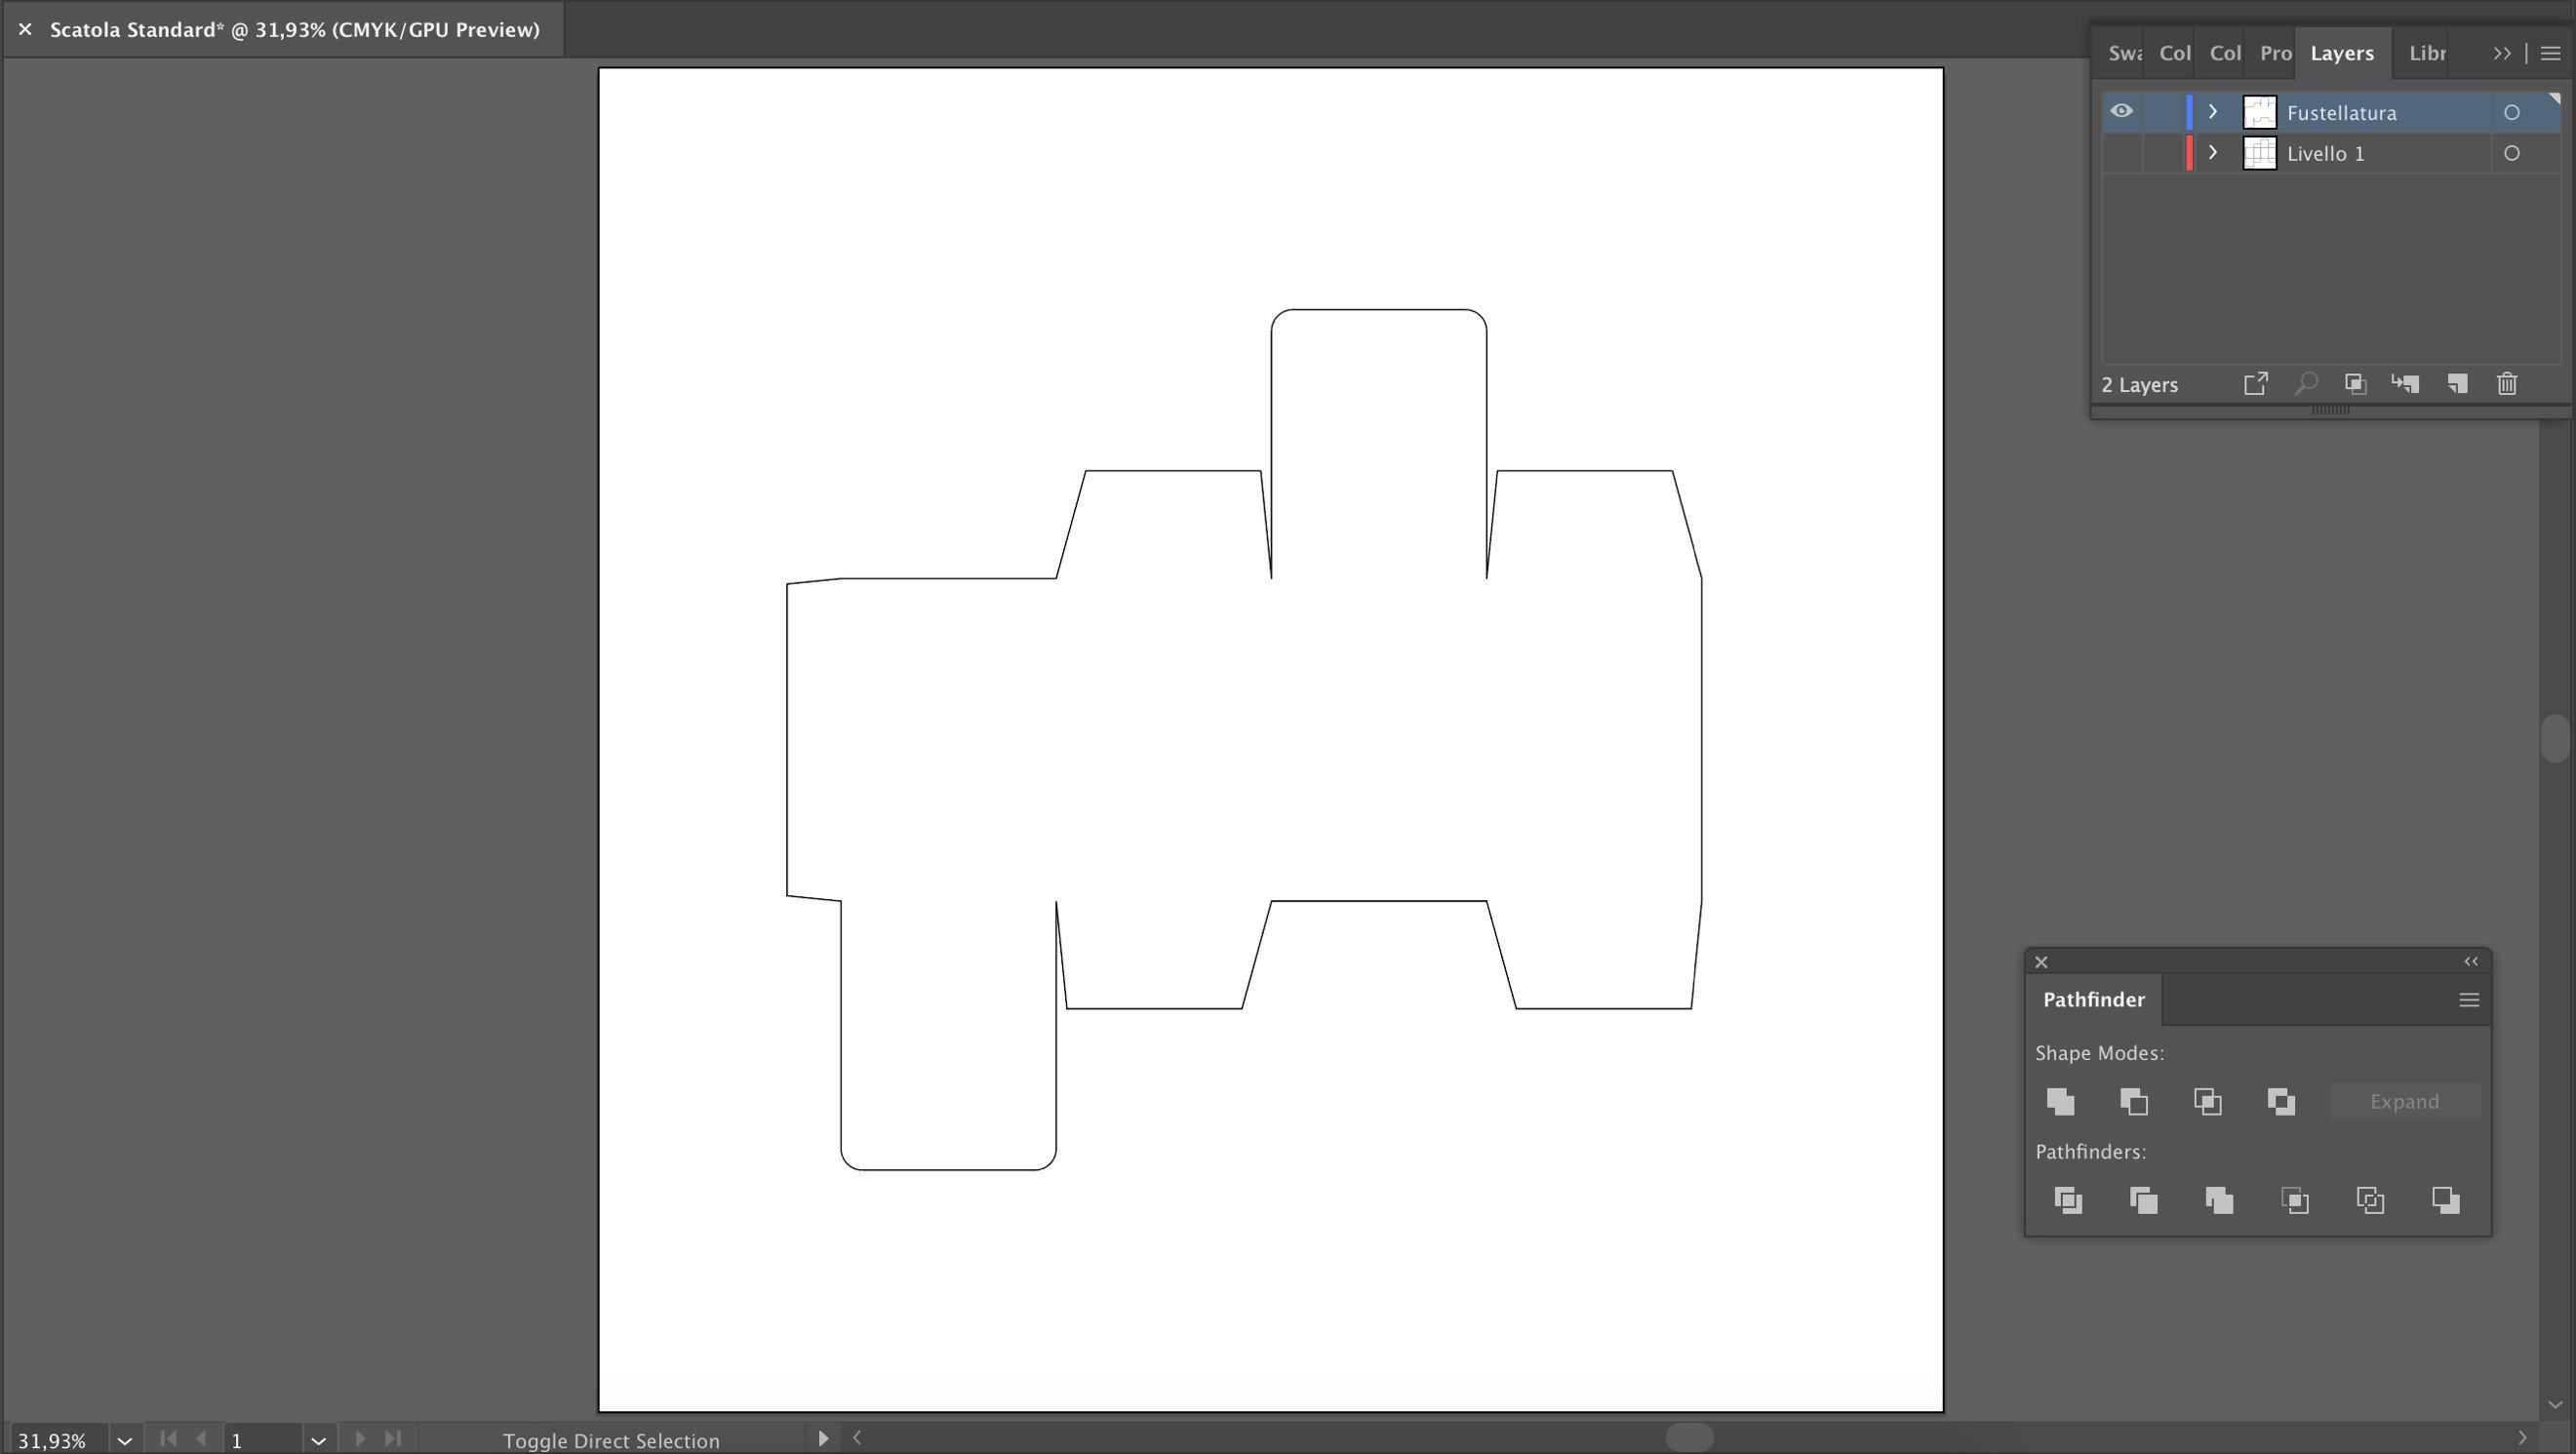
The finished box’s dimensions will be 80 x 80 x 120 mm. Start by selecting the Rectangle Tool from the toolbar. By clicking on the artboard, you can enter the dimensions for the first panel: 80 x 120 mm. As you’re creating a classic box, this will comprise four sides, which correspond to the four panels in the template. All four side panels have the same dimensions, so you can create them all at once and place them next to each other (remember to activate the Snapping option under Preferences).

2.Creating the top and bottom panels
Once you’ve created the side panels, you need to do the top and bottom flaps of the box. So go ahead and create these flaps, each with dimensions of 80 x 80 mm. Position the bottom flap beneath the first side panel starting from the left. Position the top flap above the third panel from the left.
Next, draw the tuck flaps and dust flaps. The dust flaps are trapezoids, while the tuck flaps for the top and bottom panels have rounded corners (this allows the box to be opened more easily). By locking the flaps together, it will be possible to assemble and completely close the box.
The last step is to draw the glue flap on which the glue point will be applied. This is positioned on the outside of the first panel from the left. The glue flap is vital for the solidity of the box’s structure. All the flaps have one side which is of the same dimension as the panel to which they are attached, while the other side can be of any dimension.

3.Creating the die cut line
Now that the structure is ready, you need to create the die cut and creasing lines. The die cutter is the tool that will be used to cut the sheet following the cut lines. The creasing line serves to highlight where the printer will apply pressure (using a special machine) to help fold over the box’s panels and flaps.
It’s important that the die cut line and the creasing line are on separate layers, which will help when it comes to exporting the final file.
Once you’ve created the die cut-line layer, select all the panels and flaps, copy everything, and open the Pathfinder panel. Click the Merge button to create the die cut line that will be used to cut out the box.
4.Creating the creasing line
To create the creasing line, create a new layer and use the layer with the original elements (Layer 1) as a guide. Create dotted lines where the panels and flaps meet and, therefore, where the box will be folded.

5.Filling the template with the artwork
Made-to-measure boxes that have no information on them are a rarity. Even the most minimalist designs feature at least the logo and some information about the contents of the packaging.
At this point, all that remains to do is fill the template with colours, decoration, patterns and useful information. All these elements largely depend on the brand identity, the type of product and the amount of information to be added.
It’s very important that useful information and lettering is not positioned on the die cut or creasing lines as this could make it difficult to read. Otherwise, let your creativity run wild!
6.Artboard dimensions
Before exporting the file, you need to resize the artboard. This will allow the printers to calculate the size of the sheets that need to be cut and to optimise production.
To do so, select the Artboard tool from the toolbar and click on the die cut line layer. Once you’ve created the new artboard, you can delete the old one with the 500 x 500 mm dimensions.
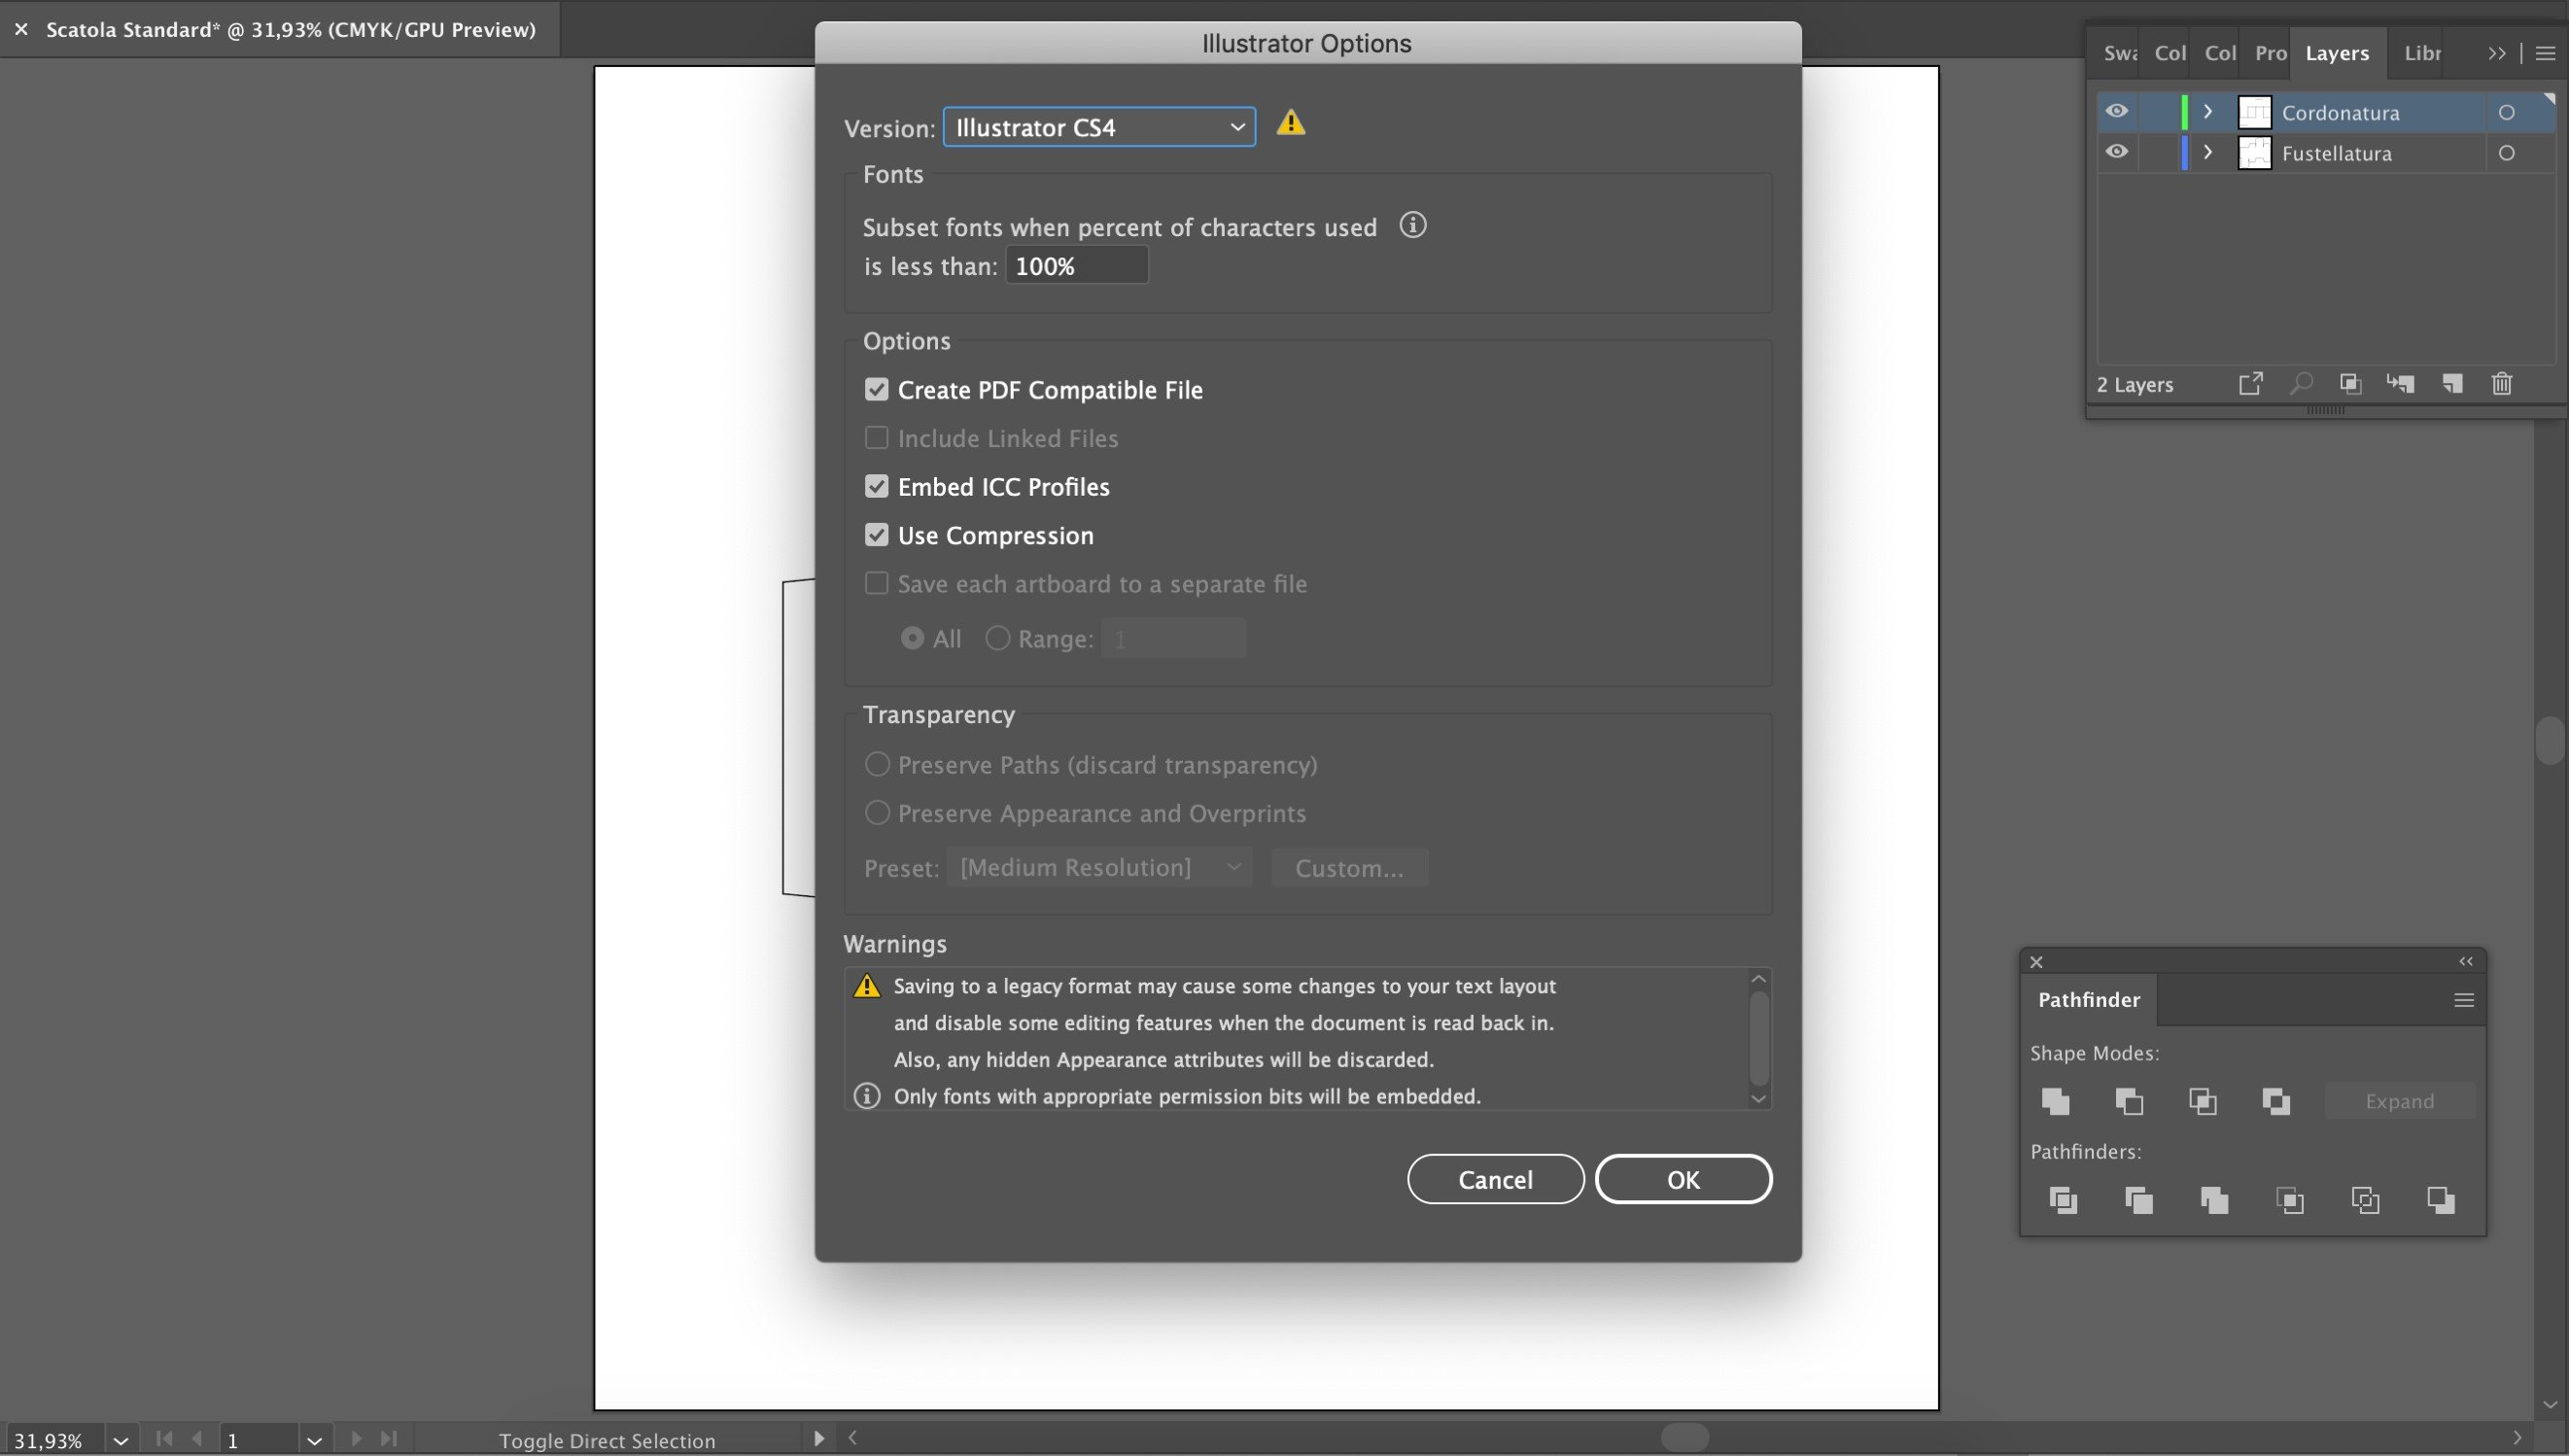
7.The packaging template is ready: how to save and export it for printing
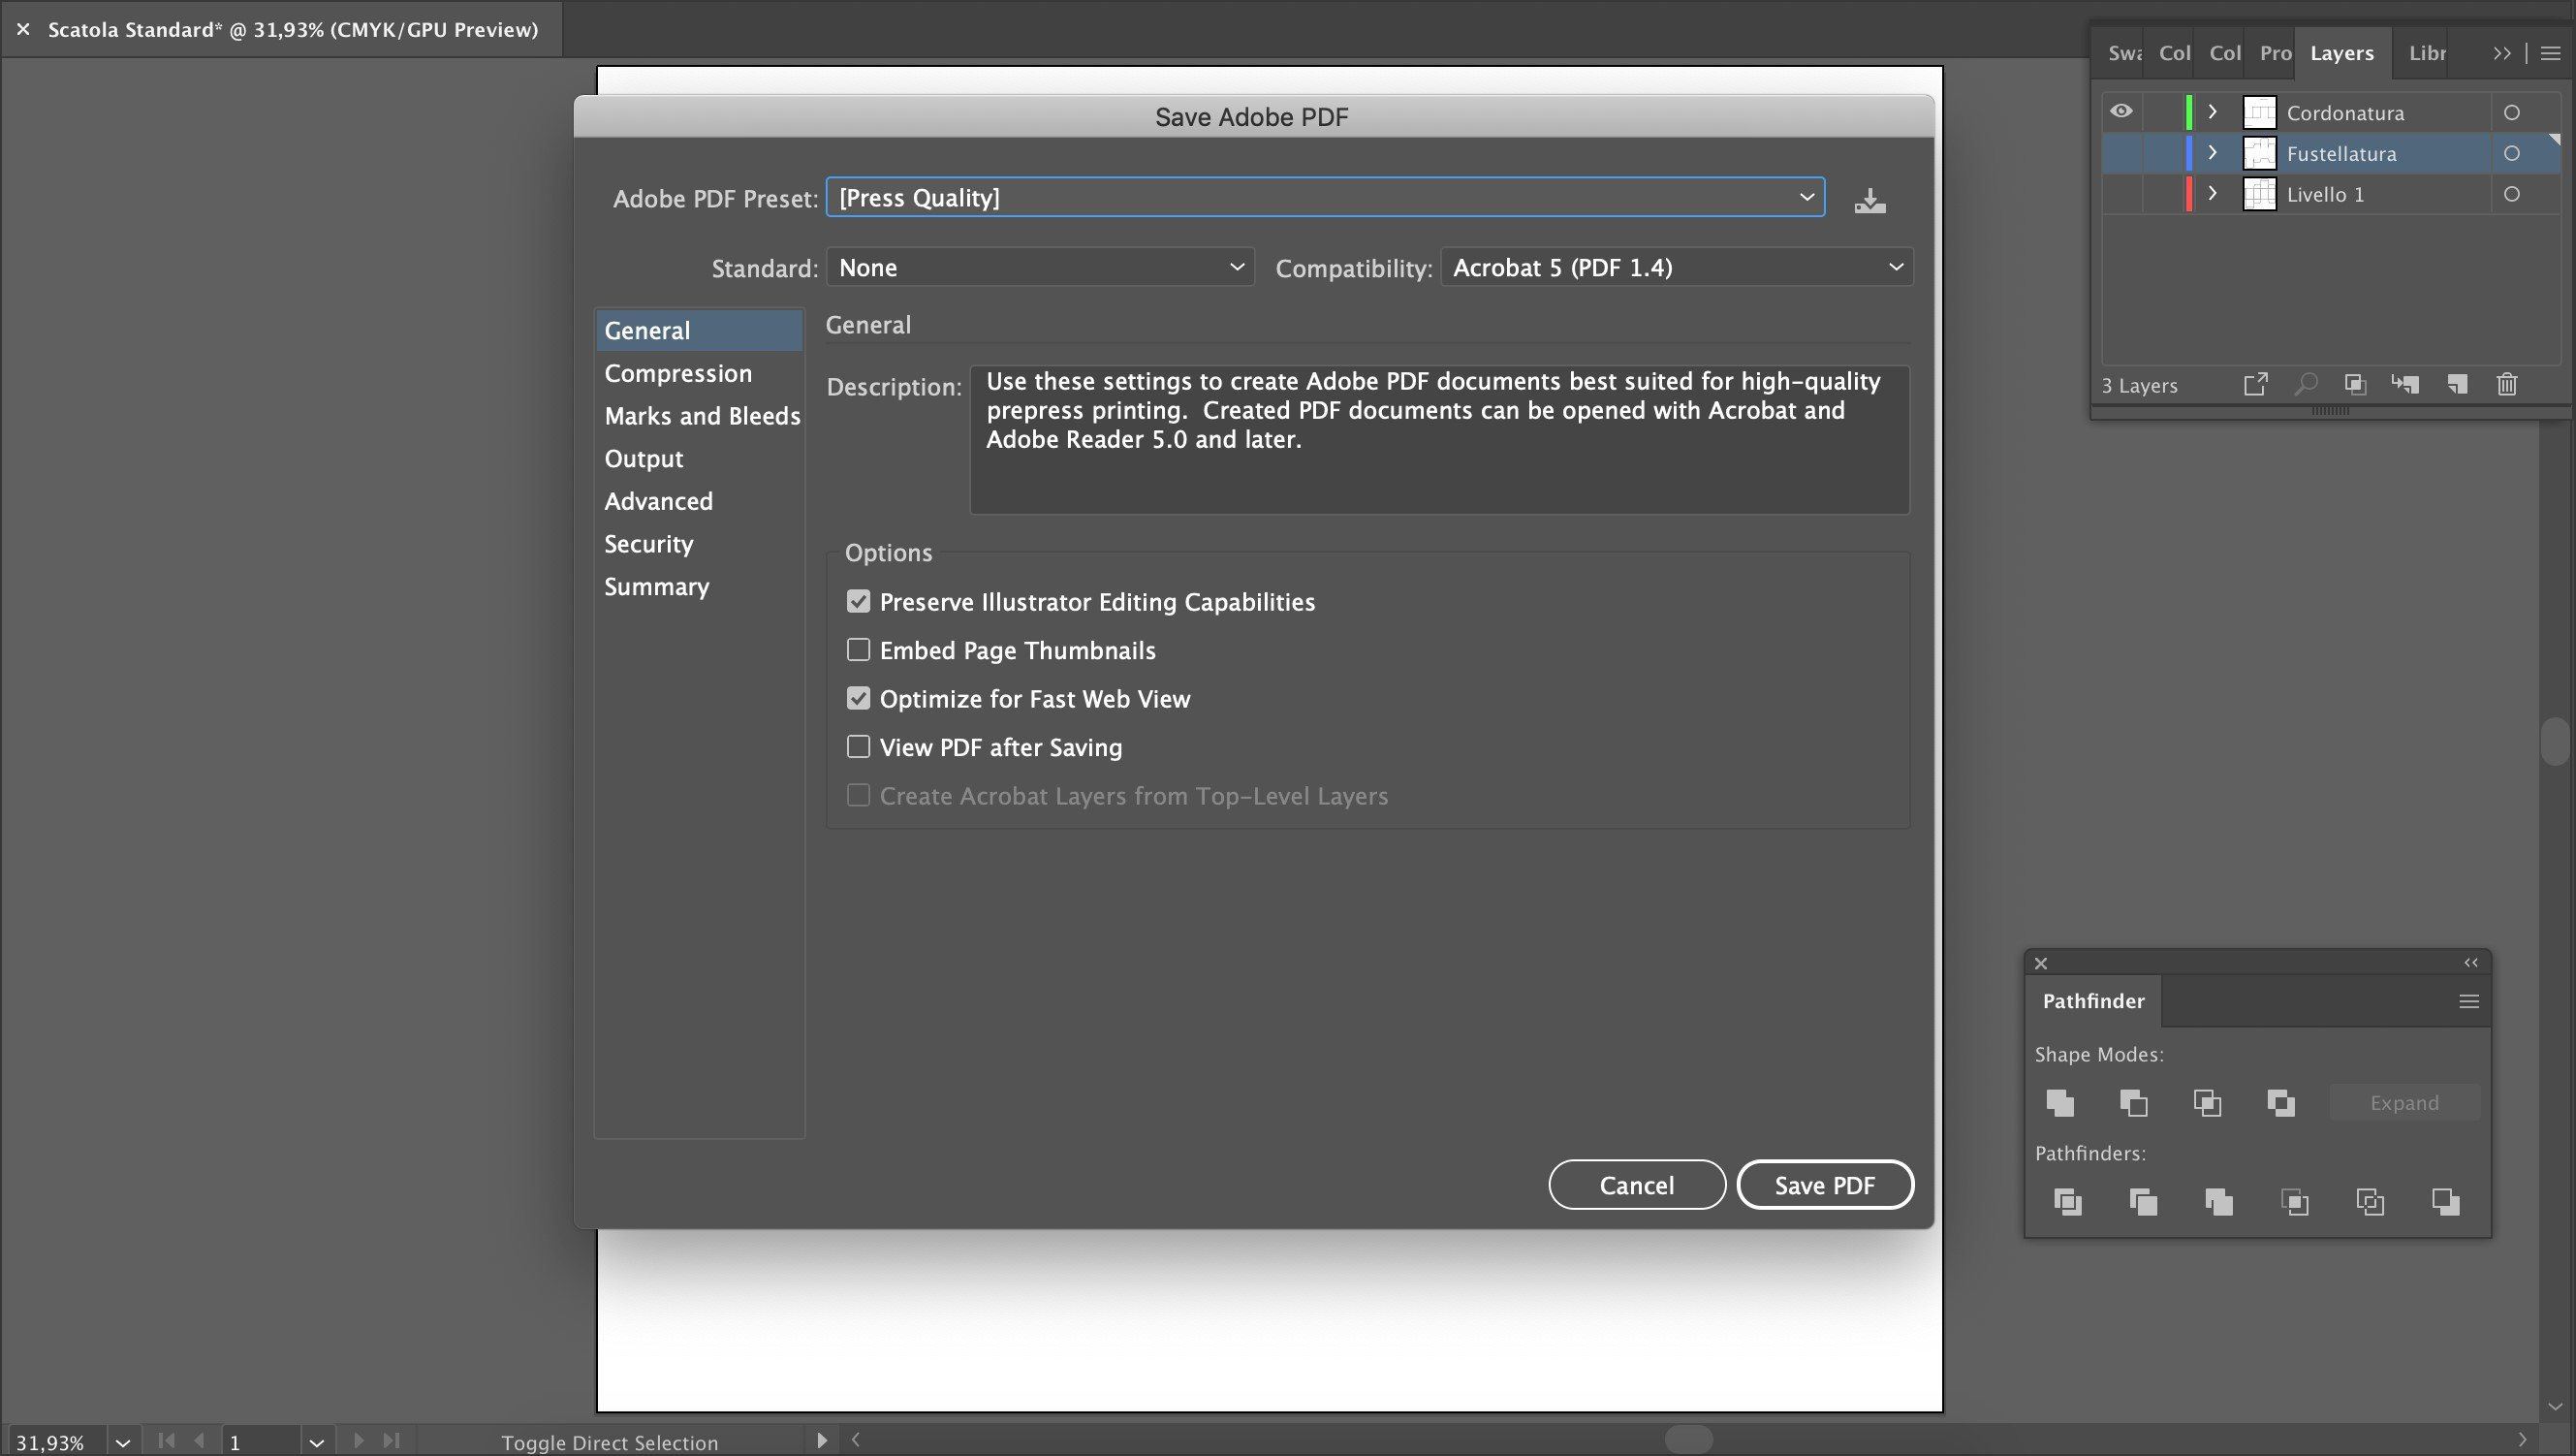
The template is now finished and you just need to export the file. There are two ways of doing this, both of which are suitable for sending the file to printers/packaging producers.
Method 1: export the die cut line and creasing line files to PDF, keeping only the layer to be exported visible. This way, you generate two files that you can call Die Cut lines and Creasing lines.
Method 2: send the printer the .ai (Adobe Illustrator) file directly. To do so, ensure that you’ve removed all layers and elements that aren’t needed for production and save the file in a previous version of the software.