
Table of Contents
Do printing and ink always go hand in hand? The definition given by the Oxford English Dictionary for the verb “to print” is: “Produce (books, newspapers, etc.), especially in large quantities, by a mechanical process involving the transfer of text or designs to paper.” Whether it’s a digital, planographic or permeographic process, direct or indirect, we usually think of printing as involving the transfer of ink to paper. But the definition above does not exclude other types of “printing”.
When we talk about “printing” we don’t just mean traditional printing with ink. There are, in fact, various techniques with which you can mark paper (and other materials) that are far removed from the most commonly held idea of printing.
Can we explore these techniques using just the tools found in the house? The answer is yes! Let’s look at a few of them.
Debossing
The first inkless printing techniques that we’ll look at are embossing and debossing. These are printing processes that involve creating images that either protrude from or are sunken into the surface of a material (normally paper, but fabrics and leather can also be used). This impression is usually obtained by pressing the material between a raised die and a recessed die.
Embossing generates an image that is raised against the background; debossing, on the other hand, generates an image that is indented into the material.
When this technique is used on an industrial scale, the raised die is made of metal, and the recessed die is generally made of resin. The exact process used depends the type of impression and the number of copies being produced. For large print runs, embossing usually adopts a system of rollers through which the material being printed passes.
To replicate this technique at home, you need to know how the process works and the have the following to hand:

- A pair of scissors
- A ruler
- Some cereal boxes
- Glue
- A spray bottle
- Printing paper
First you need to cut out the desired shape from one of the cereal boxes and stick it onto another cereal box that’s larger than the sheet you want to print.

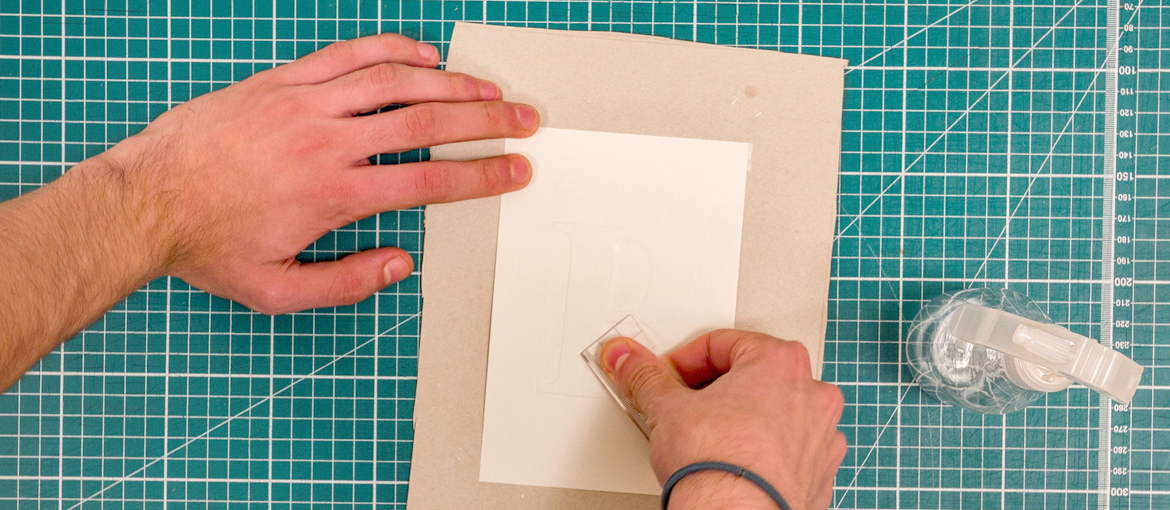
Using the spray bottle, moisten the sheet of paper and place it on the raised die you’ve just made. Using the ruler, apply pressure to the moistened sheet of paper, especially around the die’s edges. The impression will begin to take shape.

Go over the edges once again during the drying phase. You’ve finished your embossing!

Punching
Whereas embossing involves creating raised images on a material, punching or perforation means making holes in it.
While “embossing” is a term specific to the graphic arts, “punching” is more generic. In this article, by “punching” we mean the act of perforating a material with a tool that leaves a circular hole.
This technique employs that stalwart office tool, the hole punch. Hole punches usually come in two or four-hole varieties and are used to make holes in sheets of paper so they can be filed away in ring binders.
But by taking this piece of equipment out of its usual context, you can achieve a creative printing effect. What’s more, depending on the size of the holes you want to make and what you want to make them in, you can use various other common implements for punching:

- A paper hole punch
- A wooden skewer
- A pair of punch pliers
- An awl
First, take a pencil and draw the shape you want on the material that you’re going to print on.The lighter the line, the easier it will be to erase it once you’ve finished punching.

Next, choose the tool you’re going to use to make the holes. Now punch the holes by carefully following the shape that you drew with the pencil. The more consistent the pressure used to create the holes and the more regular the distance between them, the cleaner and sharper the end result.

If you use a tool that leaves small holes, like an awl, you could trace the entire outline of the shape. But if you use punch pliers, which make much bigger holes, you could create the shape as a “positive” instead.

Layering shapes
Here’s another inkless printing technique that moves away from the idea of a matrix that leaves an impression. It’s halfway between printing and collage.
It’s a process that involves the layering of materials of a similar type but with different finishes. The most common approach is to use different colours of the same type of paper, but you can also try using paper with different finishes and textures.
It entails cutting the different layers into original shapes and arranging them slightly “out of register”, so to speak. That way, the sheets of coloured paper will not be perfectly stacked on top of one another, but they will be misaligned to create a figurative, three-dimensional effect.
You need the following for this technique:

- Sheets with different characteristics (in this case, different colours)
- Glue
- A pair of scissors
As this technique is more figurative than the previous ones, you need to keep in mind the end result you want to achieve, and be prepared for a fair bit of trial and error.

You will need to cut out and position the coloured sheets based on the composition you’re after.
This technique offers enormous possibilities. By adding lots of elements and increasing the complexity, you can create veritable sculptures or book-objects that explore the possibilities of paper and its compositional qualities.
Now it’s over to you, to experiment with these techniques for inkless printing.
Enjoy!