Table of Contents
Adobe Indesign is a powerful tool full of features that make the task of creating documents and preparing them for printing more efficient. Below we review five InDesign tools that are little known but will facilitate and speed up your workflow.
1. OUTPUT PANELS
Work with overlain objects: the Attributes and Separations Preview panels
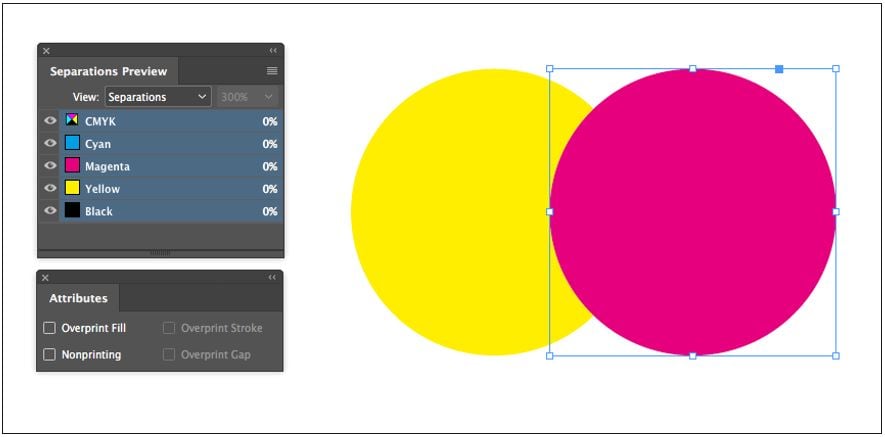
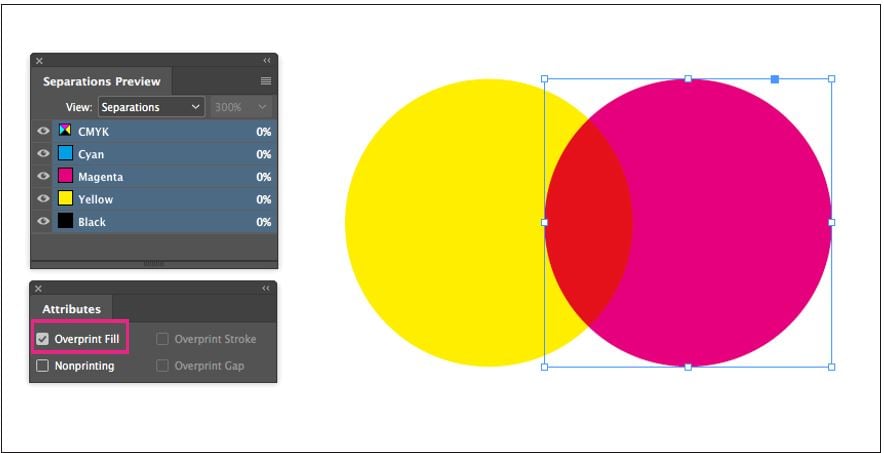
There are two ways to print objects that are superimposed: overprinting and trapping.
With overprinting, the object in the foreground is printed directly onto the one underneath, mixing the inks of the two objects.
With trapping, the object in the foreground is printed over a space with its same dimensions, so that the ink does not mix and the objects are printed with their original colours.
If an overlay mode is not specified, InDesign applies ink trapping by default.
The Separations Preview panel (Window > Output > Separations Preview) indicates the way in which two or more overlain objects will be printed. To use it, select Separations in the View menu.
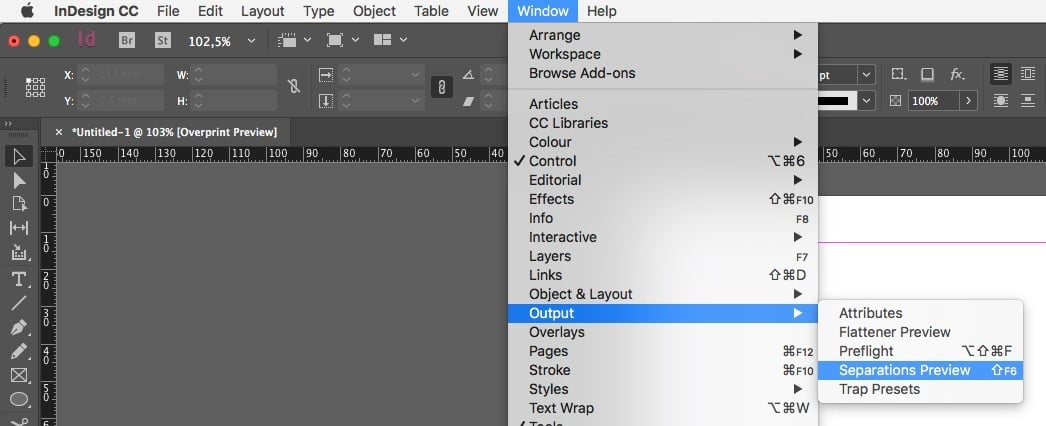
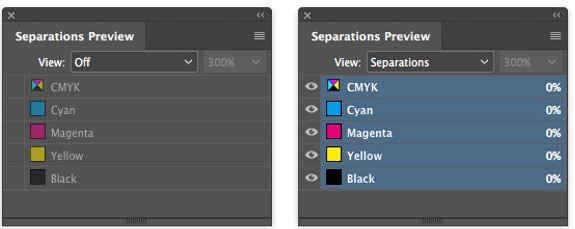
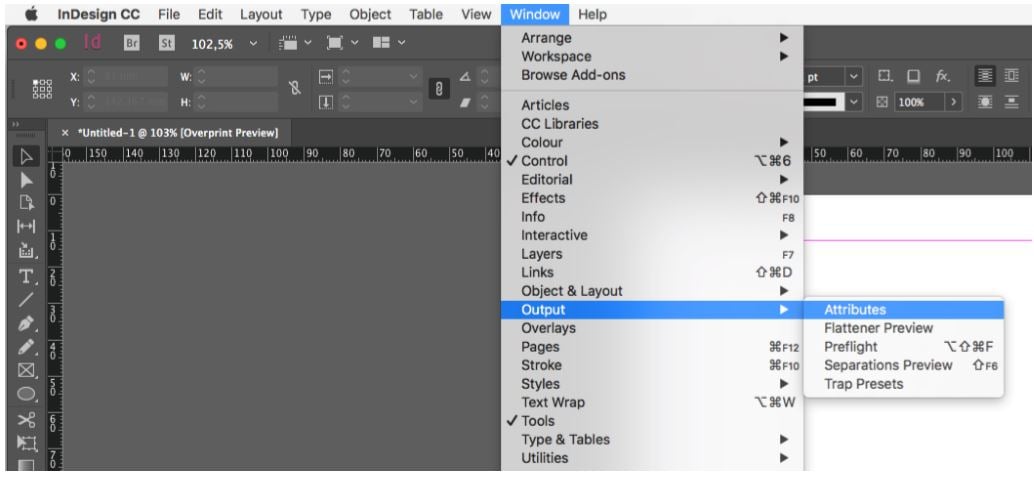
The overlay mode that you want to use for each object in InDesign can be set through the Attributes panel (Window > Output > Attributes). The options include Overprint Fill, Overprint Stroke and Non-Printable, with the latter option enabling you to work with objects that are visible in InDesign but will not be printed.
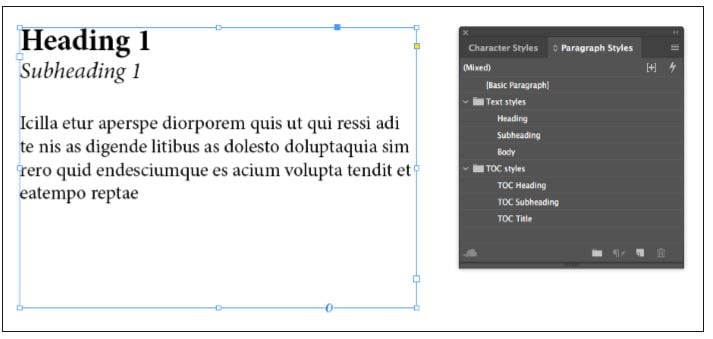
2. TABLE OF CONTENTS
Creating automatic indexes
The most useful function of the Table of Contents is the ability to create indexes automatically from paragraph styles.
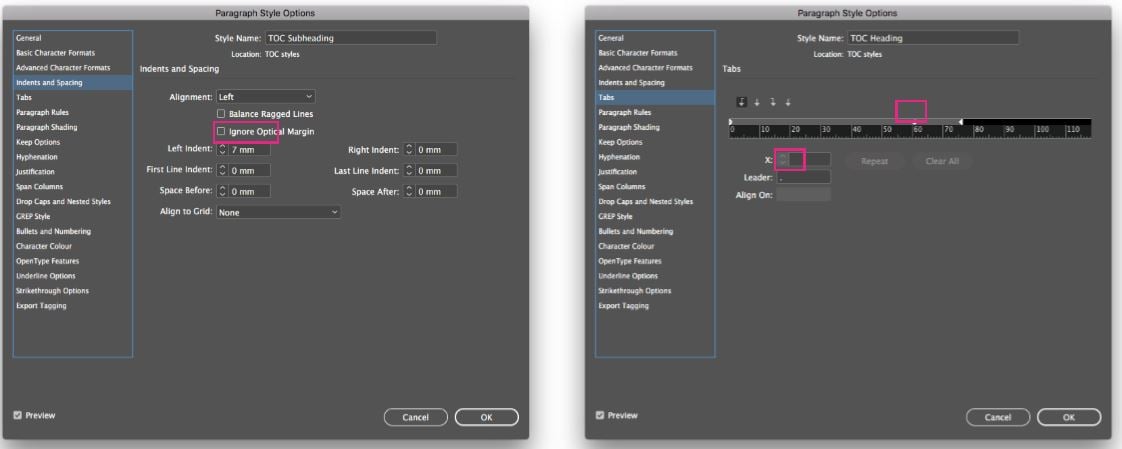
To automatically generate an index, first set the paragraph styles of the headings and the styles that will be adopted in the index (TOC styles).
In this case, the output styles (TOC styles) have been assigned a left tab and a left indent
Then, in the Layout > Table of Contents menu, insert the input and output paragraph styles, assigning their levels and, if necessary, providing a new style for the heading of the table of contents.
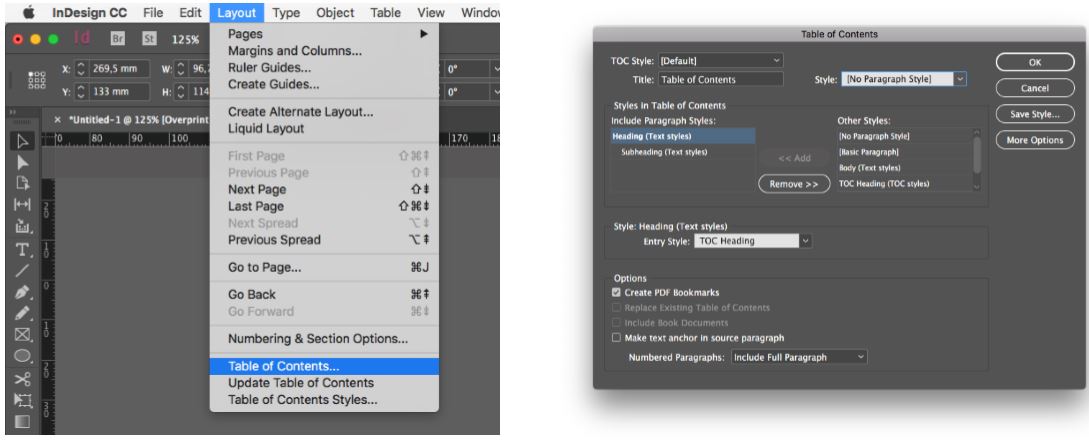
Click on OK to create the text frame with the index that you have created. To update the index after adding or editing content, click on Layout > Update Table of Contents

3. HIGHLIGHTING HYPHENATION AND JUSTIFICATION VIOLATIONS
Obtain better justifications
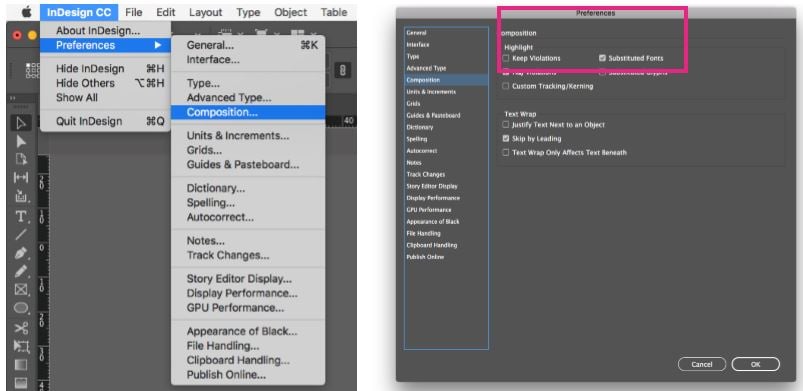
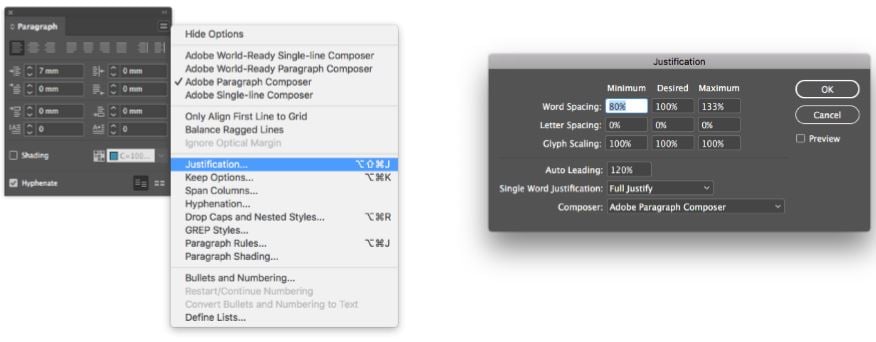
This preferences option in InDesign enables you to view any lines of justified text where the hyphenation and justification parameters have been violated, leading to poor justification.
To view these violations, go to InDesign preferences (InDesign CC > Preferences > Composition) and select H&J Violations.
In normal view mode, the violations will be highlighted in three different shades of yellow, the darkest indicating the most serious violations and the lightest indicating the least serious.
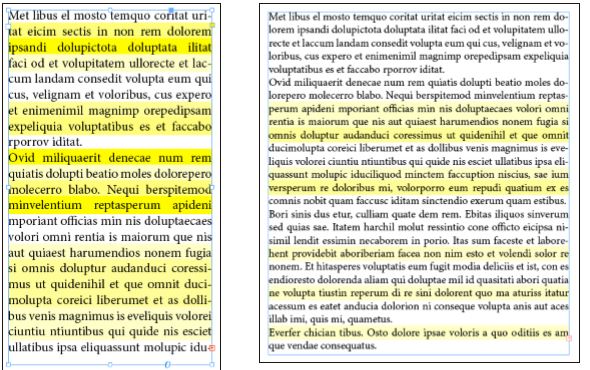
To fix the most serious violations, you can amend the font size and the width of the box, or change the hyphenation and justification options in the Paragraph panel.
4. SPLITSTORY.JSX
Interrupting the text flow between frames
The SplitStory.jsx script is pre-installed in InDesign and enables the text that flows between two or more text frames to be unlinked.
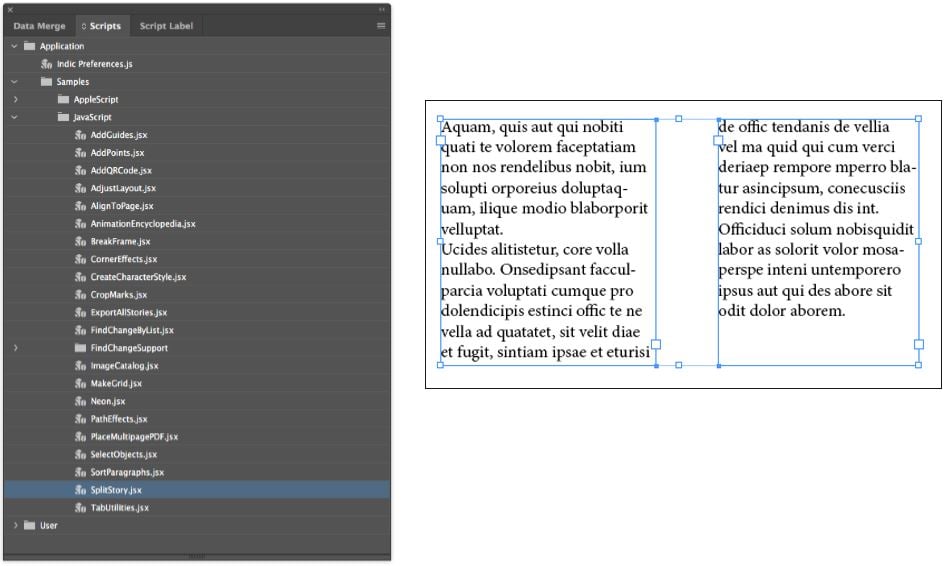
To run this script, first select the text boxes you want to unlink. Then go to Window > Utilities > Scripts.
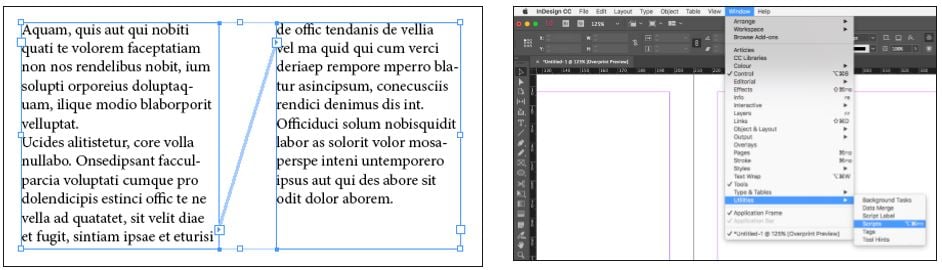
In the Scripts panel, go to Application > Samples > JavaScript and double click on SplitStory.jsx. This will preserve the text contained in the boxes but they will now be separate paragraphs.
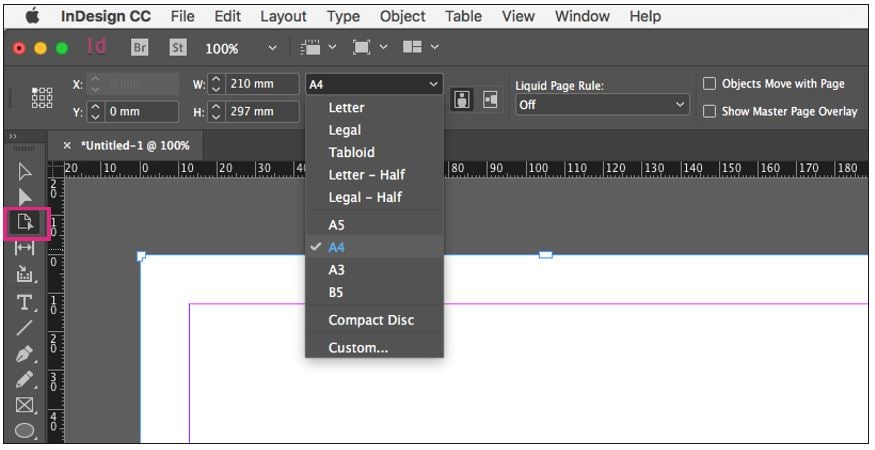
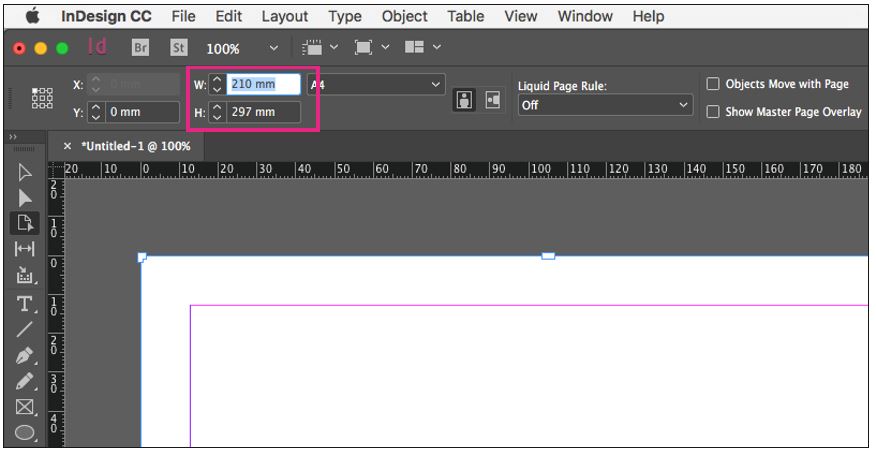
5. PAGE TOOL
Amend page sizes separately
The Page tool makes it possible to change the size of one or more pages of an InDesign CC document separately from the rest of the pages and the master page.
To use the Page tool, click on its icon on the left side panel or hit Shift + P.
Once the Page tool has been selected, you can select a page on the workbench and resize it on the top panel of the InDesign window. You can choose between standard sizes or set custom measurements.