
Table of Contents
Is making a photo calendar at the top of your creative ‘to do’ list? If you are a business looking for a unique and original item for your customers, or you simply want to make a gift that is a little out of the ordinary, you’re in the right place: our guide on how to create a photo calendar in three steps will help you with every stage of the process.
With 2018 drawing closer, making photo calendars could be the ideal way to promote your brand. Calendars, in their various forms, are objects that are always under people’s noses, whether in an office, studio, kitchen or waiting room. Like with any self-respecting marketing object, you have to find the best way to communicate the values of your company (or the brand you’re working for) through an object made of pages, photos and dates. For example, with photo calendars, you can devise a theme linked to your business and divide it up into 12 different concepts, one for each of the months of the year.
Our guide to creating a photo calendar will show you the various types of calendar you can make and print with Pixartprinting, where to find suitable photos, which software to use for the layout of the calendar and some other pearls of wisdom.
Happy reading!
1. Choosing the format of your photo calendar

The first step in our guide on how to create a photo calendar is choosing the type of calendar you want.
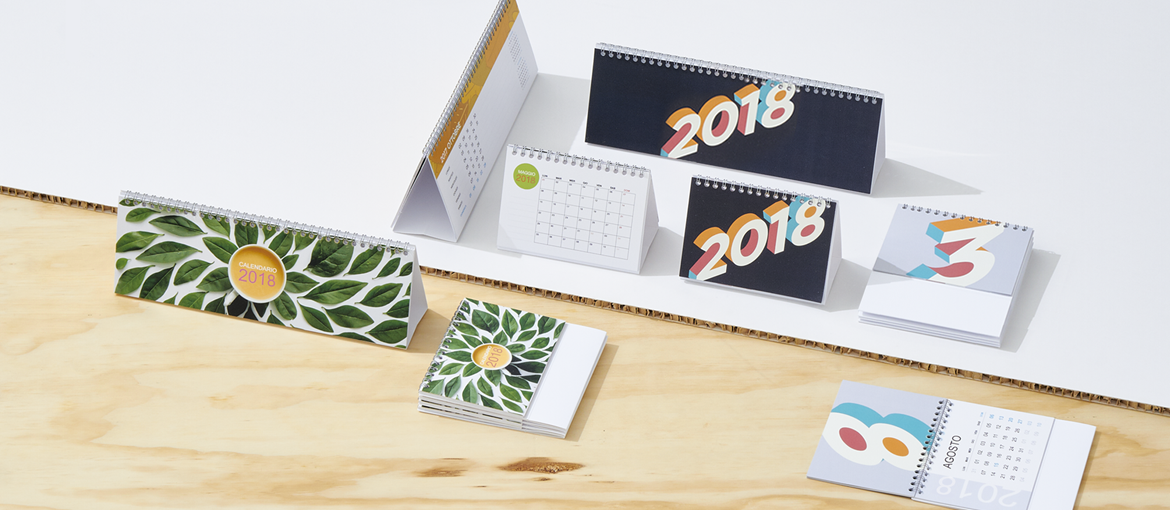
With Pixartprinting you can create photo calendars of various types, all designed for different uses. First of all, there are the classic spiral-bound wall photo calendars, in which each month has its own page.
Another type of photo calendar you could create is a desk calendar, which again is spiral-bound, and has a triangular shape, allowing it to sit on your office desk. Then there are photo calendar posters, available in a single size, 42 x 59.4 cm, which allow you to see the entire year at once. There are also planners, classic week-to-view glue-bound office calendars, with a cardboard back and tear-off sheets, designed for keeping close at hand at all times to note down important events. The design options with this product are more limited, but you can still customise them with photos or patterns. Yet another option is the pocket-sized photo calendars, with optional lamination, which could make the perfect gift for your customers. Finally, calendar bookmarks are a handy and highly original idea, particularly suited for brands in the culture sector.
Now we’ve listed the various types of calendar you can choose from, our guide to creating a photo calendar will continue with a discussion on a very important topic: the images.
2. Choosing the images for a photo calendar

And so to the next stage in our guide to creating a photo calendar. It goes without saying that the images are not only the element that grabs the attention of those looking at or using the calendar, they are also the most customisable part, and therefore should contain the message you want to communicate through your photo calendar.
To make a good photo calendar the images must be in high resolution and as original and meaningful as possible.
If you are a company and want to create a product for your customers or employees, you could, for example, hire a professional photographer to take some original portraits of your employees. For instance, if your firm has some connection to the sport, you could show employees in front of your headquarters, but dressed up ready to take part in their favourite sporting activity.
Associations, on the other hand, might want to use the calendar to assemble the highlights from the past year’s activities with their members. This means going through photos taken during the year with a fine-tooth comb and selecting the best ones, before hiring a graphic designer to add the finishing touches so they all have a matching style.
If, however, you want to create a calendar with free photos, the web is the best place to look for high-quality, zero-cost material. Why not have a look at our guide to the best sites for free photos?
3. Creating a photo calendar using Adobe InDesign and the Pixartprinting template

Now you’ve chosen the photos you want to use on your calendar, let’s continue to the next stage of our guide to creating a photo calendar. When making a photo calendar with Pixartprinting, once you have chosen the format that best suits your needs you need to download the corresponding template.
The template is the tool that will provide the framework for your work, and on it, you can alter virtually everything: feel free to add images, change the font (pay attention not to go below 6 pt) or rearrange the layout of the different elements.
To modify the template and make your photo calendar, you’ll need to use the professional desktop publishing software Adobe InDesign.
However, there are certain things you should take care not to alter at this stage: the number of pages, the file dimensions and the bleed. Furthermore, the fonts you use when making your photo calendar must be embedded into the PDF or converted into curves or outlines. Finally, the PDF files should be sent in single-page format and in reading order, without crop marks or registration marks.
To be sure the file you’re uploading is ready for printing, we recommend, as always, that you choose the Professional File Check option when ordering your printed photo calendar with Pixartprinting.
Ready to flick through the pages of a new year? Get designing!