
Table of Contents
How do you go about formatting your book and printing and binding it with Pixartprinting’s sewn binding? This article gives you step-by-step instructions on how to create a high-quality graphics file to send to Pixartprinting.co.uk for printing, ensuring you receive the sewn-bound product of your dreams!
Sewn binding is a style of binding designed for high-quality books, and it is crucial to ensure the file you send for printing is set up correctly if you want to achieve the desired result. To help you do this, we’ve produced a summary of the main steps to follow to create a flawless graphics file for your book.
Sewn binding is particularly suited to books designed to last, where the quality of the end product really matters (for more information, see our guide to the various types of binding). It can be used to print particularly special products such as poetry books, collections of illustrations or graphic novels, or for more practical purposes, such as printing a particularly sophisticated catalogue or binding a recipe book for that cookery course you’re organising.
So how do you format a book of this type and print it? Simple – through the Pixartprinting website! For the best possible results we recommend you follow a few of our suggestions when preparing your print file: from choosing which program to use to exporting the final PDF.
Download the instructions file for formatting a book with Pixartprinting.
Which desktop publishing program should I choose?
Our guide on formatting your book with sewn binding starts with the first choice you’ll have to make: which program to use for creating your print file. In theory you can use any desktop publishing program, from more professional software like Adobe InDesign to everyday programs like Microsoft Word. There is also free, or almost free, DTP software available online: we discussed it in this article.
However, we recommend choosing software that is suited to creating content for printing, so you can be sure you have all the tools you need to prepare a print-ready file: from setting the margins to ensuring the page order is correct. Your options include Abobe InDesign, Microsoft Word, Lucidpress and Scribus.
Formatting your book: setting up the graphics file
Let’s continue our guide to formatting your book: as soon as you have loaded up your chosen software, you’ll need to set up your page to work on. Be very careful to replicate the parameters you chose when completing the order form at the beginning of the process of printing your book with Pixartprinting.co.uk.
Please note: the layout instructions for the cover file, which is sent separately, can be found further down the page.
Page orientation
Choose the same orientation (landscape or portrait) that you selected when ordering.
Number of pages
The minimum number of pages allowed for sewn-bound books is 48, and the number you use must be divisible by eight. Make sure you insert the same number of pages that you chose when ordering.
Please note: “page” here means one side of a sheet of paper, so a sheet printed double-sided counts as two pages.
Page order
The file should be created in single pages in reading order.
Dimensions
The dimensions should be the same as you selected when ordering, plus a 3 mm bleed on each side. The bleed is a safety margin that will be trimmed during assembly. For example, if you chose a 15 x 21 cm format in your order, each page should be set to have a width of 156 mm (150 mm + 3 mm bleed for the left-hand side + 3 mm bleed for the right-hand side) and a height of 216 mm (210 mm + 3 mm bleed for the top edge + 3 mm bleed for the bottom edge).
Margins
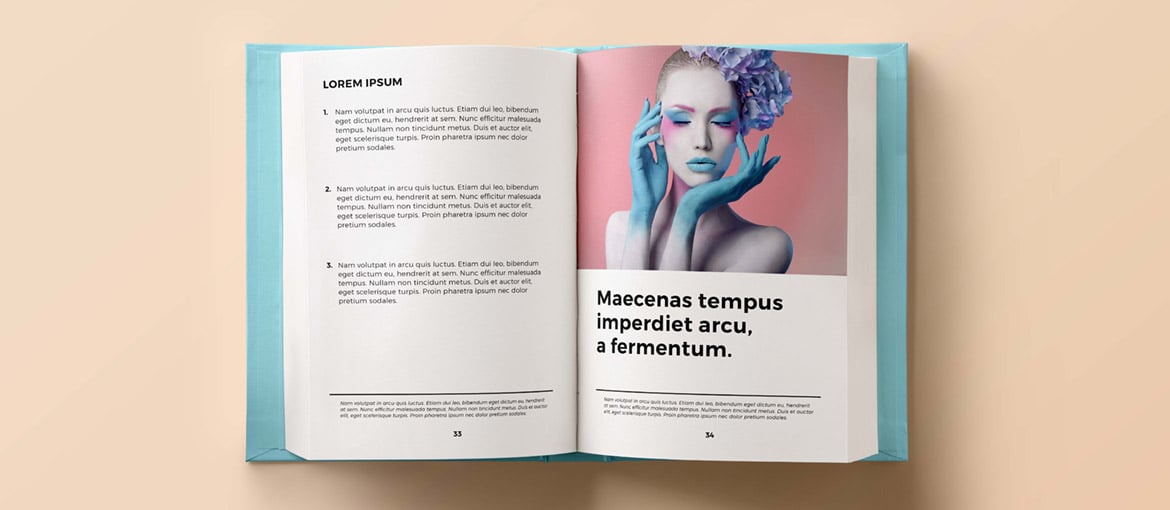
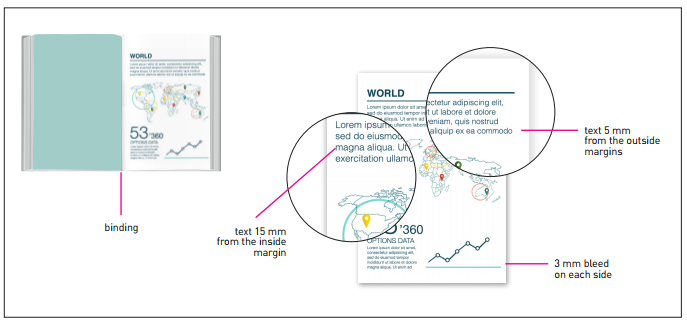
Setting the margins on each page helps you to know where to position your text and images. Contents placed too close to the edge of the page or the binding could be difficult to read or cut off by mistake. For this reason, we advise leaving an outer margin of at least 5 mm and a 15 mm inner margin. The outer margins refer to the edges of the sheet of paper, where it will be cut, and the inner margin is where the book will be bound. The top and bottom margins will therefore always be outer margins. On odd pages the inner margin will be on the left, while on even pages it will be on the right.
To get your head round it, one option is to build a small-scale model of the book you want to print: take sheets of the same dimensions, number them, assemble them and put some paper clips on the left-hand side. You’ll notice that on page 1 the “binding” will be on the left, on page 2 it’ll be on the right, and so on. Whenever you are unsure about creating your print file, simply go back to your model and take a look at the way it is laid out!
Once you’ve set up your file correctly, you can start inserting your graphics and text. Continue reading our guide on formatting your book with sewn binding to discover how to insert images suitable for printing.
How to format your book and bind it using sewn binding: adding high-resolution images
Sewn binding is designed to create a high-quality product, and it would therefore be a shame to spoil it with low-quality or mediocre images. Our guide on formatting your book therefore continues with an explanation of how to insert high-resolution images.
The images you add to your book should have a resolution of 300 dpi and should be in the CMYK colour mode. To check your image has a high enough resolution, open it with an image editing program like Adobe Photoshop or GIMP (free and open-source software). To check or alter the image’s resolution and colour mode, go to the image menu (or the equivalent in the program you’re using) – you will find the resolution given in px/in (pixels per inch), which is effectively equivalent to dpi. Images downloaded from the internet usually have a resolution of 72 dpi, so we do not recommend using them in your projects. The “colour mode” option is also found in the image settings menu. If your image is in RGB, you’ll need to convert it to CMYK. Take care during this stage, because the conversion could affect how the colours are printed.
Formatting your book: the cove
Our guide to formatting your book continues with an explanation of how to set up the graphics file for the cover. The cover needs to be sent as a separate PDF file containing just two pages. The first page is for the outside cover spread (with the back cover on the left and the front cover on the right), while the second page contains the inside front and back cover (the inside front cover on the left and the inside back cover on the right). Look at the image below to give you a better idea, or build a small paper model for a better understanding of how the pages are laid out.

Cover page size
To work out the correct dimensions for the cover, grab a pen and paper and get ready to do some calculations.
As mentioned above, the first page of your file must contain the back cover and the front cover, separated by the spine of the book: the width of the spine depends on how many pages you have in your book, and is calculated automatically when you place your order. Don’t forget to add a bleed of 3 mm for each side to this figure.
Let’s look at an example: if you chose a 15 x 21 cm format, the width should be set as follows: 3 mm bleed + 150 mm for the back cover + the spine width given when ordering + 150 mm for the front cover + 3 mm bleed. The height will be 3 mm bleed on the top edge + 210 mm + 3 mm for the bleed on the bottom edge. The second page in the file, for the inside front and back pages, will have the same dimensions.
Please note: if you chose a cover with flaps or case binding when ordering, follow the additional instructions in this guide [link a pdf].
Formatting your book: exporting the print file
Exporting the PDF file to send for printing is a very important part of our guide on formatting your book. The PDF file must be in high resolution, in a press quality or PDF/X-1a format. More professional software will allow you to choose the precise format of PDF you are exporting. For more simple desktop publishing programs, like Microsoft Word, make sure you have chosen to optimise the PDF for printing.
You’ve reached the end of our guide on formatting your book and binding it using sewn binding. For extra peace of mind when it comes to the end result, we recommend choosing the Professional File Check option when ordering, so the Pixartprinting team can check your file is correct and ready for printing and binding!