Labels that convey the taste of a natural, homemade food.
That was the idea behind Elena’s combined analogue and digital approach to help her client, Luciana.
The jars of preserves and bottles of oil produced by Luciana needed the right outfit for every occasion.So Michela bought her a kit to customise her products with printed labels that emphasise the “handmade” aspect.
Now Luciana’s preserves and oils look as good as they taste. Elena explains her creative process that blends low and high tech.
Ready to find out more?
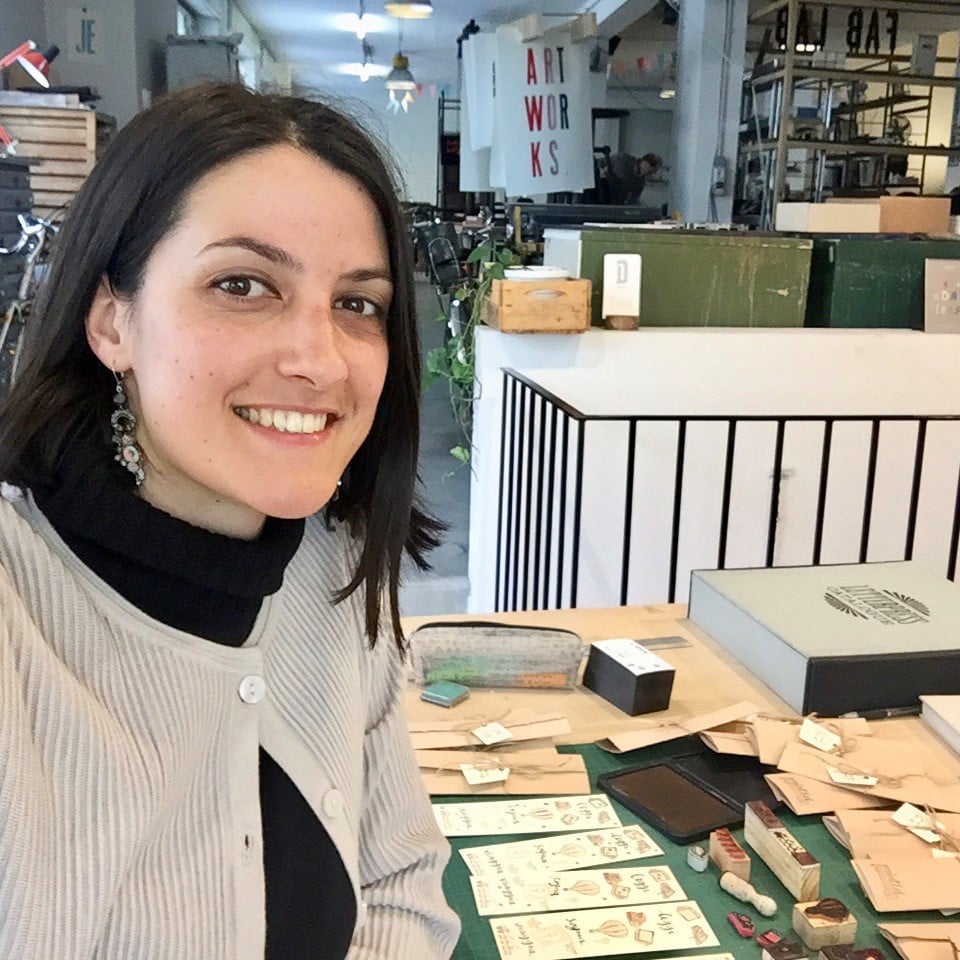
Who is Elena? Tell us about yourself and what you do in life, and your dreams, aspirations and talents. A short but faithful portrait!
In general, what I aspire to in life is getting the best out of myself, and helping others to do the same. Since I was little, I have always had a passion for producing custom creations to give to friends and family, and, in recent years, I’ve started doing them on commission (as you can see from my Instagram account #printlel).
A customised product can say something about the giver, as in the case of invitations or sweets, or something about the receiver, as in the case of a picture or diary with illustrations informed by their tastes and passions. In both instances, there is special care that uniquely expresses the affection of the giver and receiver. I love customising things for other people because it lets me explore different worlds; I feel that this is the right path for me and hope to continue along it!
Before telling us about your idea, can you explain to our readers what you produced using our printing services?
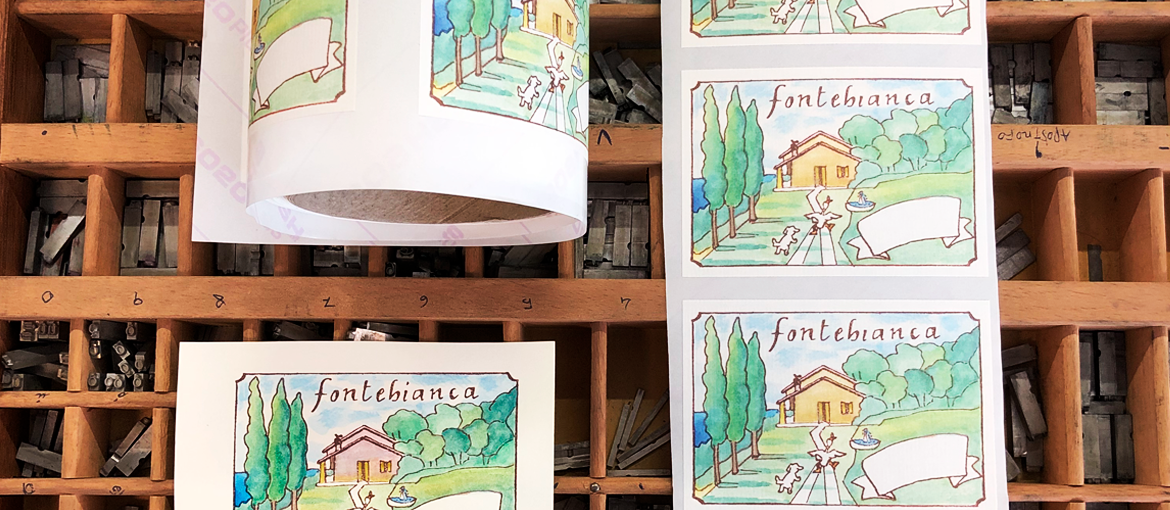
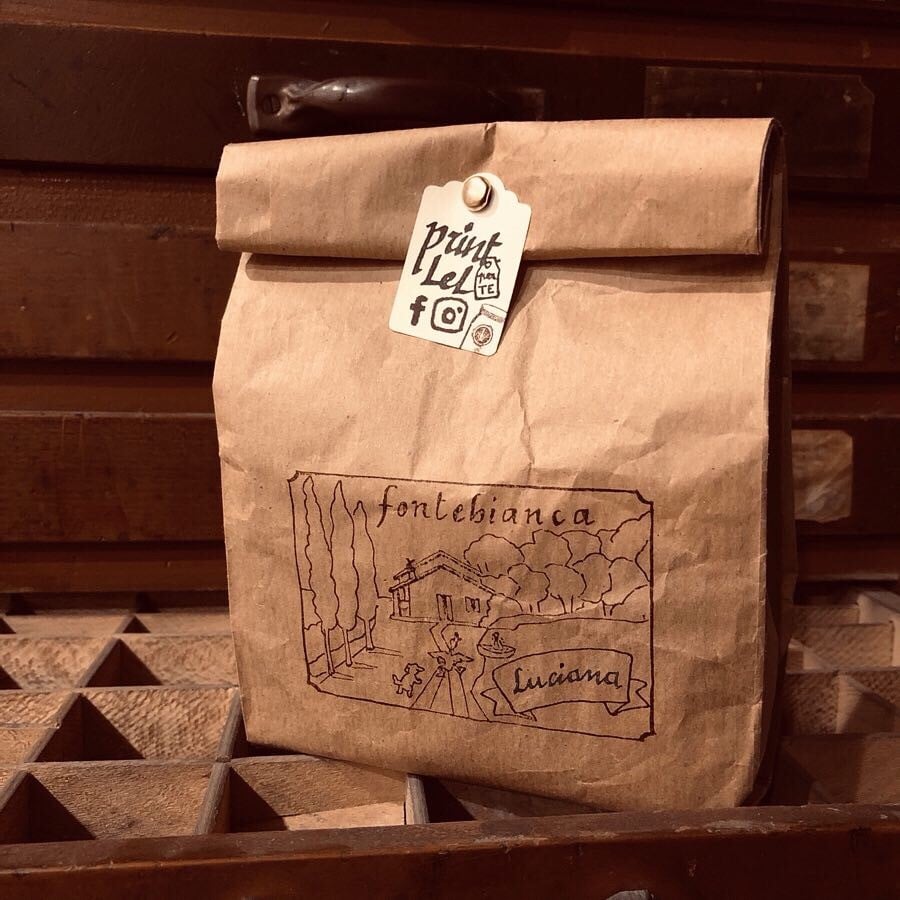
The end product that you printed was a roll of 200 self-adhesive labels to stick on bottles and jars.
Let’s go back to the moment it all began. When was the idea for this design born? Tell us a bit about how you came up with it.
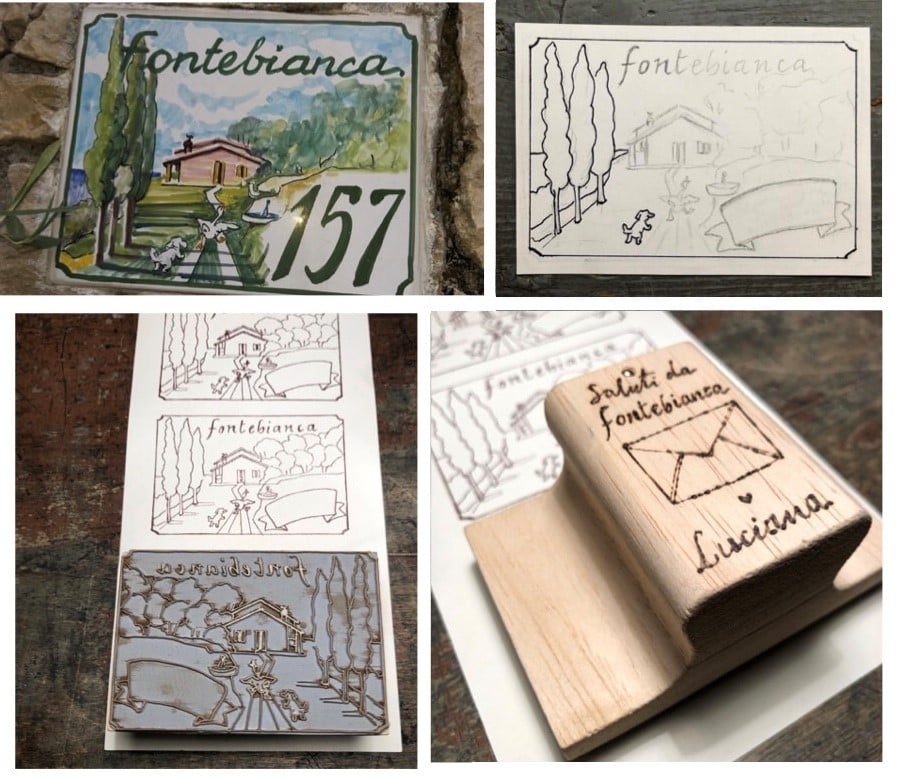
It all started with the wish of a client, Luciana, to put a design of her house on greetings cards and on self-adhesive labels for sticking to her homemade preserves and the bottles of olive oil that she produces every year with olives from her garden.
Once you had settled on the idea, you had to set a goal. What did you hope to achieve? What would be the ultimate aim of your work?
The ultimate goal was to find the solution that best met Luciana’s needs. As far as greetings cards were concerned, to obtain a handmade and customised effect, we decided to create a rubber stamp. Thanks to the stamp, the design can be reproduced over and over again on any card and different colours can be used depending on the occasion.
When it came to the self-adhesive labels that would be stuck on bottles and jars, the design needed to be printed with durable and waterproof ink, so we opted for digital printing on special paper.
We have the idea for the design and its objective. Now we need to create it! How did you do it? What were the design phases and how many were there? Tell us about the process that brought your idea to life and made it ready for printing.
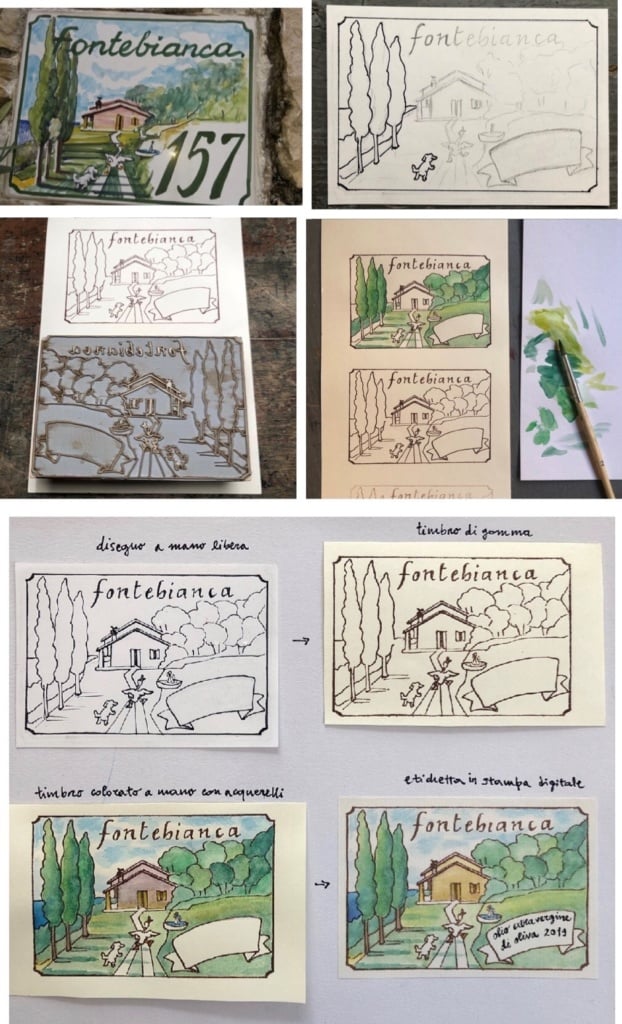
Here are the five phases of my project:
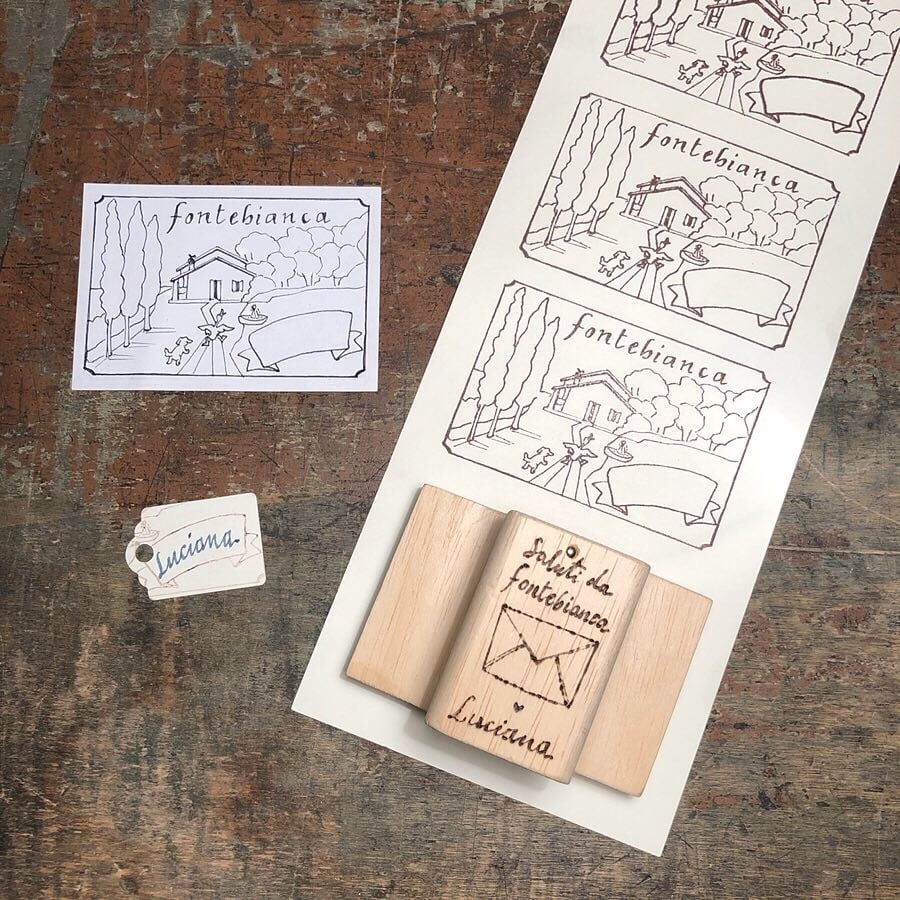
- Luciana sent me a photo of her house number tile, which featured a picture of her house. I copied the design onto a little piece of paper in the desired format. I left an empty space that could be customised by hand with, for example, a name, date or message in the case of greetings cards, or a product description in the case of labels;
- I took the design to a stamp maker who scanned it and engraved it onto a rubber stamp using a laser cutter;
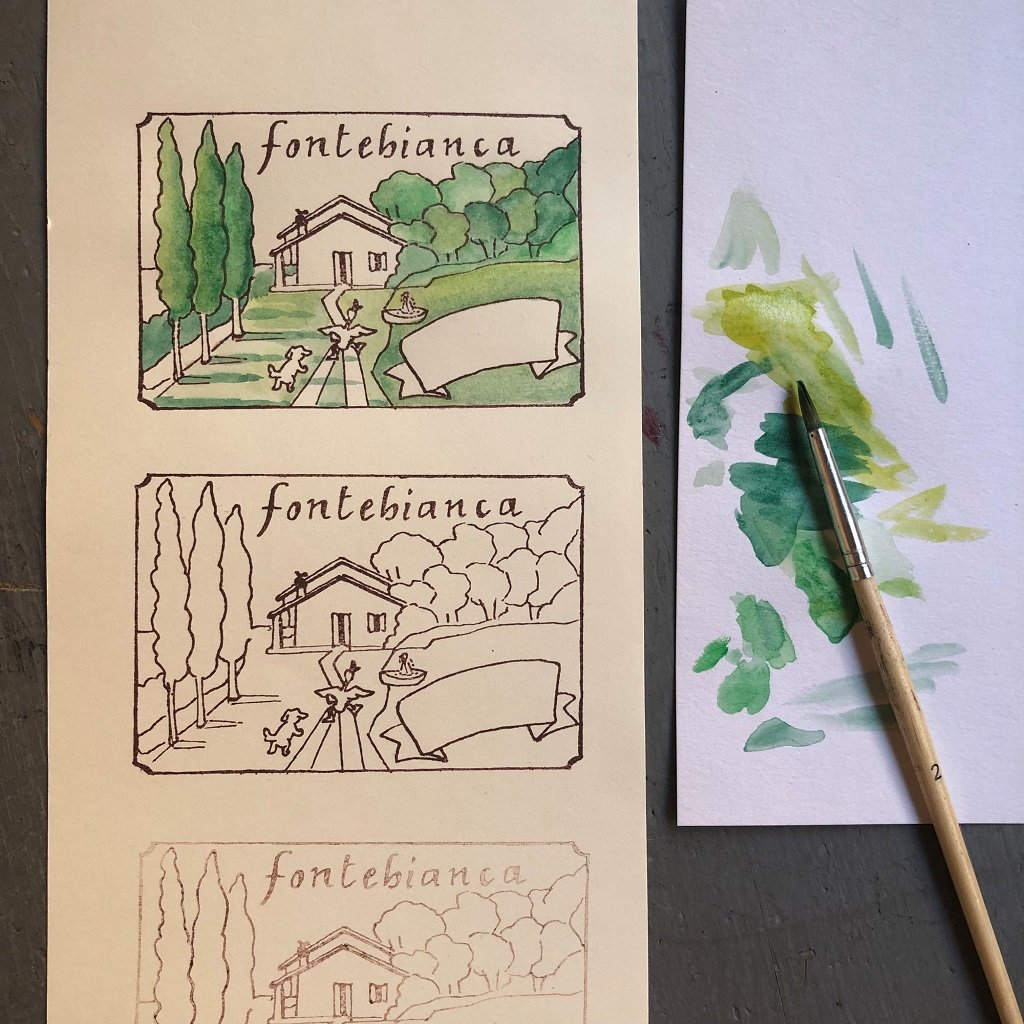
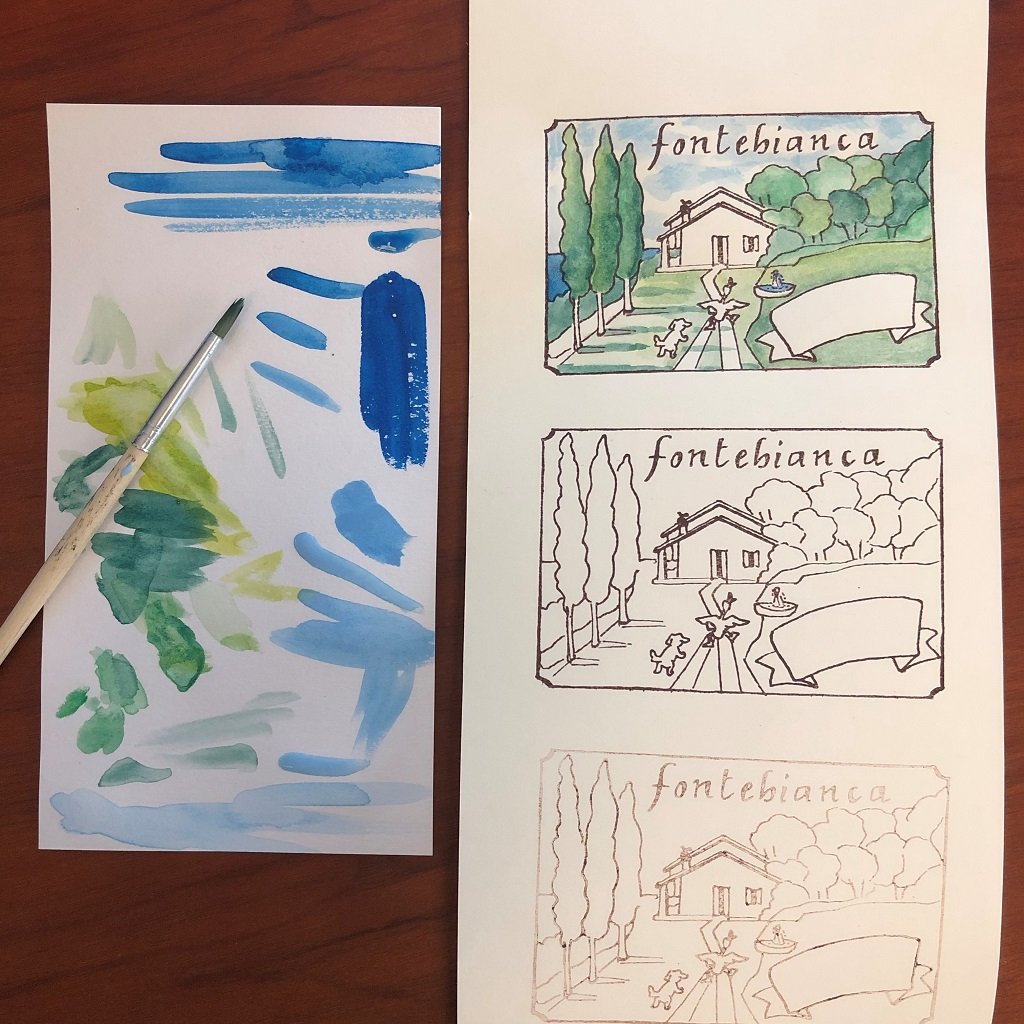
- I then stamped the design onto ivory paperboard using sepia ink and coloured it in with watercolours;
- Next, the design was scanned, configured and sent to Pixartprinting. There was then an excited wait for delivery of the finished product.
- I then customised the handle of the stamp using pyrography and wrapped it in a simple package decorated with the stamp.
It’s time to print! How did you use print on demand to produce your design? Which materials did you use?
For this phase, I completely relied on my friends at Lino’s & Co Verona, who I collaborate with. Wechose Betulla Laid Paper because it brought out the texture of the design, giving the impression of an unvarnished, handmade product. We’ve been using Pixartprinting for some time and had no doubts about the final quality!
Printing complete! In your case, you wanted to put the labels on bottles and jars of food. Did these products end up on the table? How did it feel to see them ready to bring a smile to people’s faces?
I still haven’t seen them in the flesh, but I was delighted to receive this photo from Luciana:
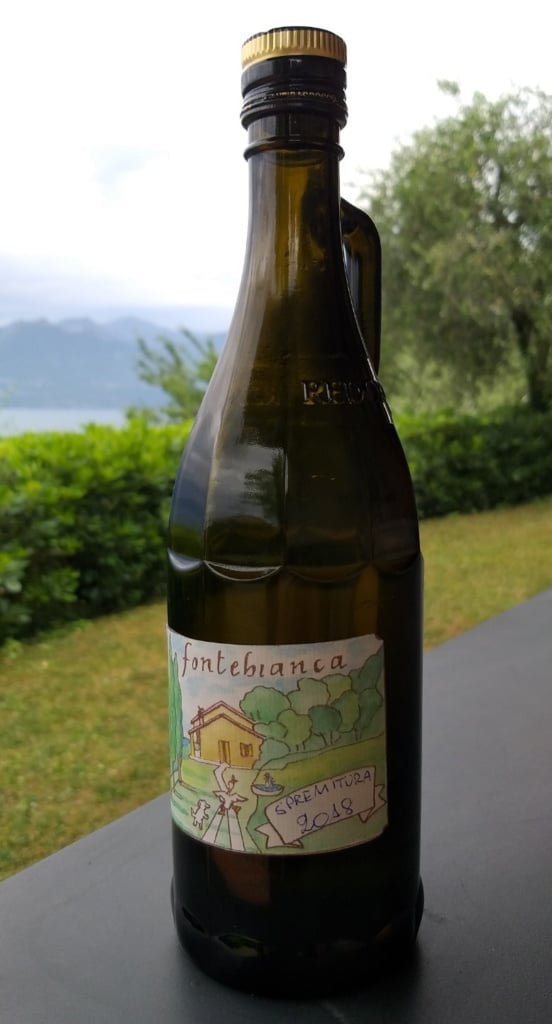
It’s most satisfying to have helped her customise products that say something about her house and her produce. Especially because, being real products that she will share with friends and family, they are authentic and special signs of affection that will surprise and thrill!
This is only the start! What other projects do you have planned for the future? Can you share them with us?
Work-wise, I’d like to collaborate with someone who organises events so I can get back to decorating and customising tables and venues for special occasions. In the meantime, I have various creations planned for the near future, such as wedding invitations, business cards, baptism bookmarks and baby pictures and diaries